Data Area Security - Database Roles
Database roles are part of Timextender Data Integration (TDI) security functionality and are a prerequisite for configuring object level and row level permissions for specific data area objects including views, schemas, tables, and individual table columns. The steps for creating a database role differ slightly depending on whether your Prepare instance uses SQL Server or Snowflake as its storage.
Database Roles Setup
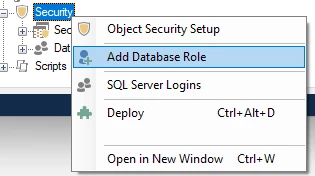
The Security folder in the data area tree displays all of the current security setups. Right-click on the Security folder to see the options needed to configure a new security setup.
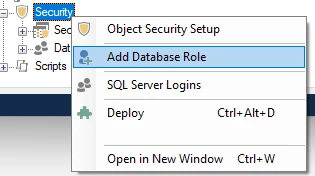
Configuring data area security encompasses the following two steps.
- Create a database role.
- Use the database role to set up either object level or row level security.
This article explains the first step of creating a database role in detail. The subsequent step of creating either object level or row level security is explained in the following two related articles:
Step 1: Add or edit SQL Server Logins
Note
This step applies to Prepare instance on SQL Server only. If your Prepare instance uses Snowflake, skip to Step 2: Adding a Database Role — Snowflake uses account roles as role members rather than SQL Server logins.
The first step in setting up object level security on SQL Server is to identify an SQL Server login to use for the database role. SQL Server logins can be viewed within TDI and new logins can be created, provided the account used for the data area SQL storage has sufficient permissions.
If a suitable SQL Server login is already available, you can skip this step and add the login as part of Step 2.
Use the following steps to add or edit an SQL Server login:
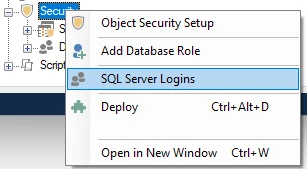
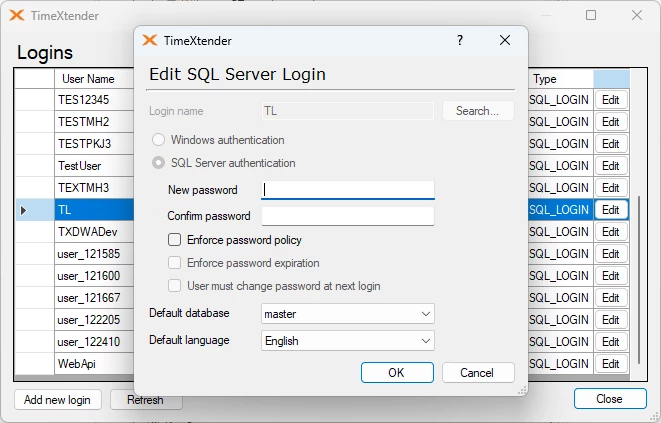
- Under the data area, right-click Security and select SQL Server Logins to open the Logins window.
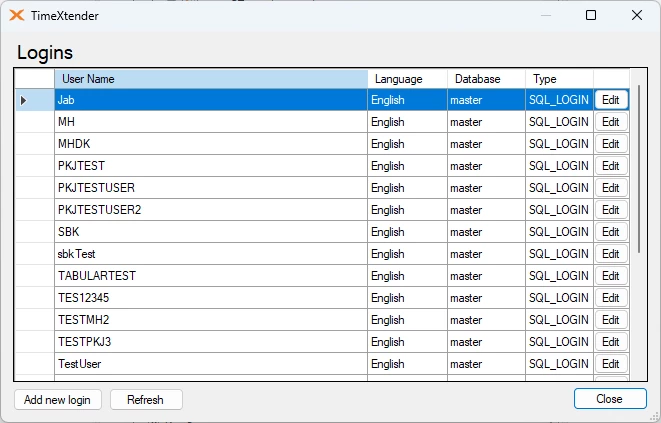
- All existing SQL Server logins are listed. If a suitable login exists, skip to Step 2. Otherwise, click the Add new login button to create a new SQL Server login.
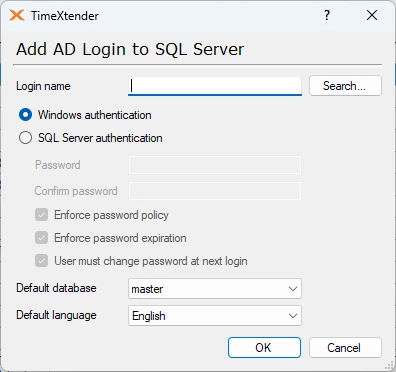
- In the Add AD Login to SQL Server window, enter a name in the Login name box. New logins can be added for either Windows or SQL Server authentication:
- To add an Azure AD login, click on Search and locate the user.
- To add a SQL Server authentication login, select that option and enter a username and password in the fields provided.
- Click OK to save the new login.
- Click the Refresh button to reload the list if the new login is not yet visible.
- (Optional) Click the Edit button next to an existing user to edit as needed.
Step 2: Adding a Database Role
The second step is to create a database role, which can later be used to implement object level or row level security. The role members differ by storage type: SQL Server roles use SQL Server logins as members, while Snowflake roles use Snowflake account roles as members.
Use the following steps to add a database role:
- In the data area tree, right-click the Security folder and select Add Database Role.
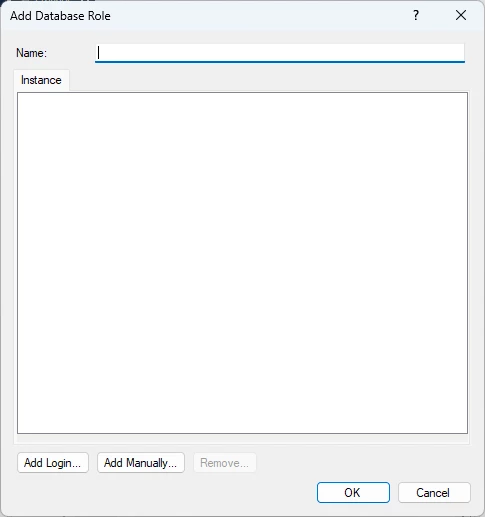
- In the Name box, enter a name for the database role.
-
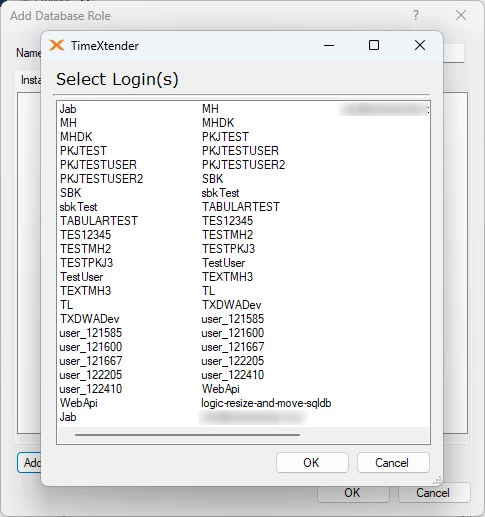
Add members to the role: - SQL Server: Click the Add login button to add logins from the SQL Server configured for the data area storage. Select the logins to add from the Select Login(s) window and click OK.
 - Snowflake: Click Add Account Role... to choose from the list of existing Snowflake account roles retrieved from the connected Snowflake instance. Alternatively, click Add Manually... to enter a Snowflake account role name directly.
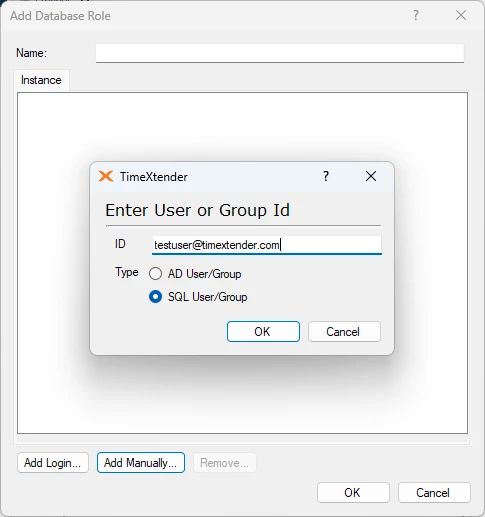
4. (Optional, SQL Server only) If a suitable SQL Server login is not yet available, click Add manually to add Active Directory or SQL Server users or groups not already present on the SQL Server. In the Enter User or Group ID window:
1. In the ID box, enter the ID for the user or group.
2. For Type, select either AD user/group or SQL user/group.
3. Click OK to add the user.
-
Click OK to close the window and add the database role.
Note
Roles are limited to the data area they were created in. A role created in one data area will not apply to a different data area within the same Prepare instance.
Drop Roles Configuration
On each deployment, TDI drops the existing roles on the database before recreating them. By default, it drops only the database roles related to the data area being deployed. This behavior can be changed via a setting on the data area. To access this setting, right-click on a data area and select Edit Data Area.
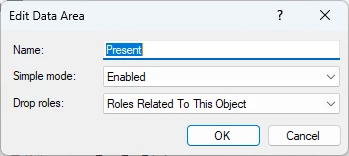
In the Drop Roles setting menu, select from one of the three following options:

- Roles Related to this Object — drops only roles related to the data area being deployed.
- Roles Created by Application — drops all roles on the database created by TDI.
- All Roles On Database — drops all roles, including those not created by TDI.
On Snowflake, TDI identifies which roles it owns using the role Comment field, which stores the TDI project ID, object ID, and owner ID. The Roles Related to this Object and Roles Created by Application options rely on this metadata. Roles created outside of TDI have no such comment and are only affected when All Roles On Database is selected.
After the prerequisite database role has been added to the data area, it is now possible to implement object level or row level security. Click on either of the following links for the articles that explain this second step in setting up data area security.
Discussed in the community
Looking for related questions…
Didn't find your answer? Ask the community about this page — questions are answered by Timextender experts, partners and other users.