Creating a Custom Data Validation Rule
Custom data validation rules allow you to ensure data quality by defining specific criteria for your data. This feature is particularly useful when you need to validate data that doesn't fit standard data validation rules. These custom validation rules help maintain data integrity by flagging records that don't meet specified criteria. For example, you might use a custom validation rule to ensure that a product code follows a specific format or that a date falls within an acceptable range.
Data Validation using Custom Field Transformations and Conditions
- Create a custom field for error flagging:
- Open your project in Timextender
- Navigate to the table containing the email addresses
-
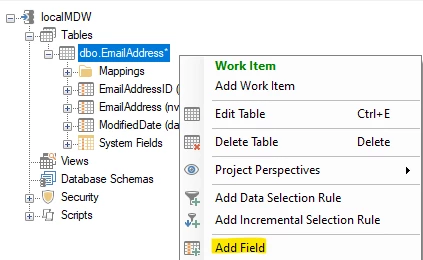
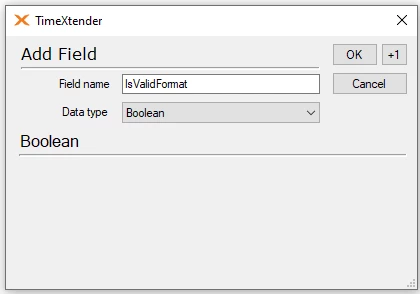
Right-click the table and select Add Field to create a new field. Name the field "IsValidFormat" and select data type Boolean
-
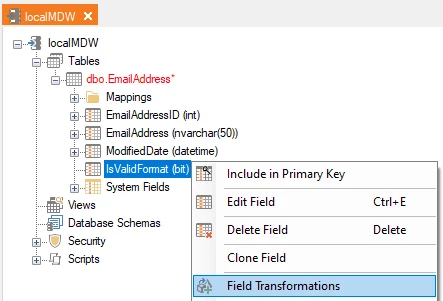
Right-click the IsValidFormat field and select Field Transformations
- In the Field Transformations pane, select the Fixed Value operator and enter 0 as the value and click Add
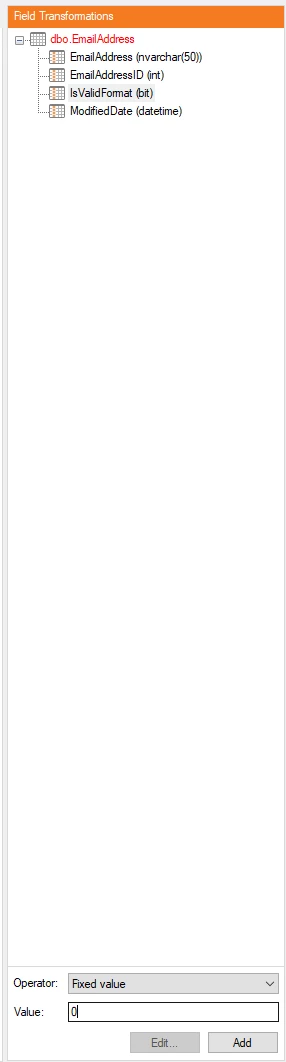
- Repeat step 3 and enter 1 as the value and click Add
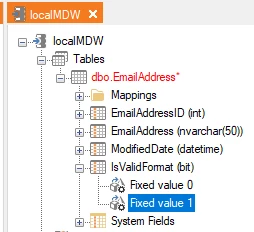
- Right-click Fixed value 1 and select Add Condition
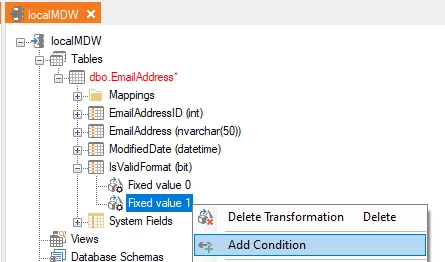
- In the Conditions pane, click Add
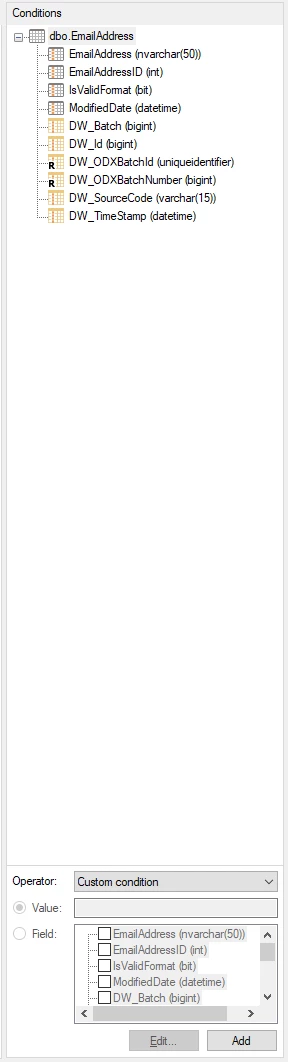
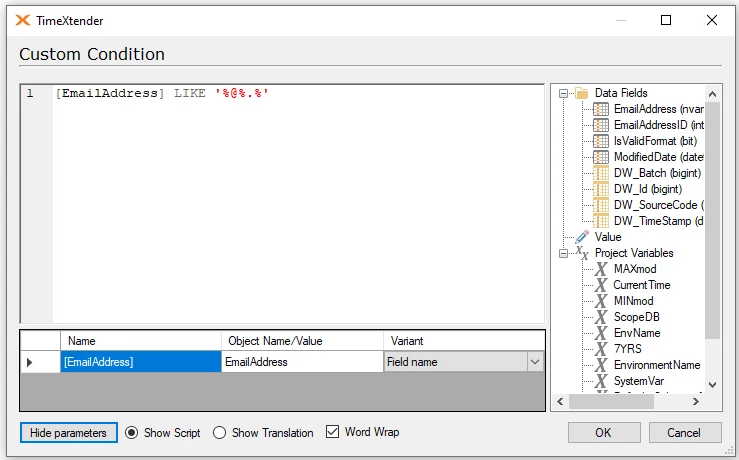
- Add the following SQL statement, add the field name parameter and click OK
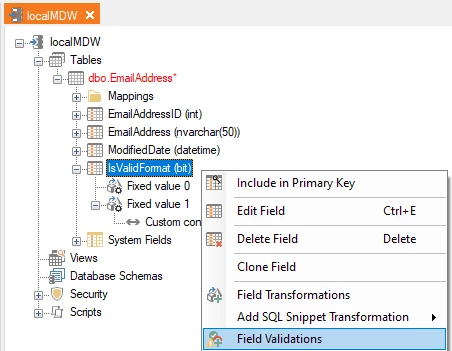
- Right-click the IsValidFormat field and select Field Validations
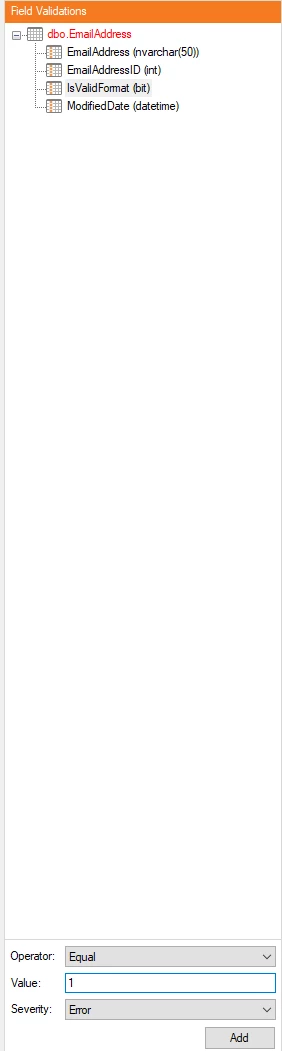
- Enter 1 as the value and click Add. This means that all records with a value of 1 in this field are to be considered valid, and any other value is to be considered an error.
-
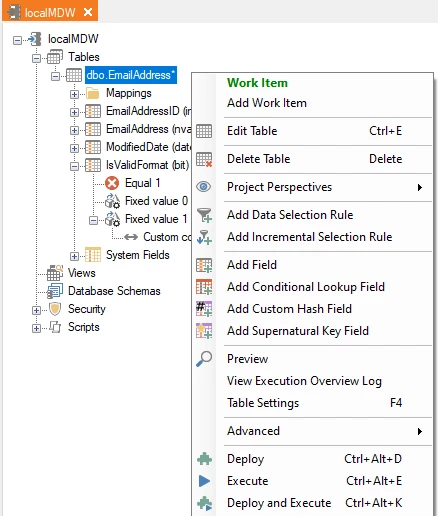
Deploy and execute the table
-
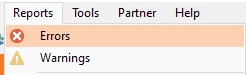
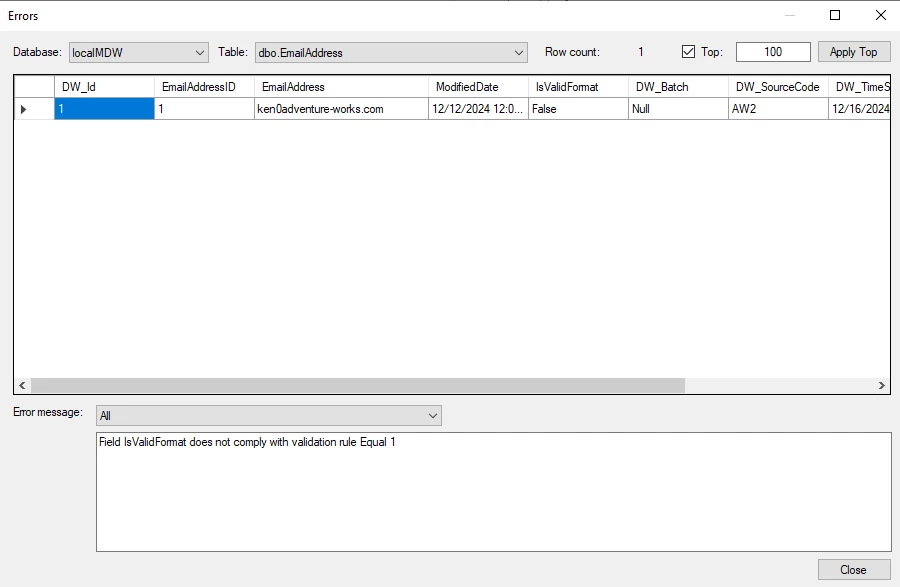
Navigate to Reports in the ribbon and select Errors. Select the database and the table to see a list of errors. In this case we have one error. In other words one record where IsValidFormat=False (i.e. 0) since the email address does not fit the custom validation rule we setup since it does not contain at @ symbol
Data Validation using Conditional Lookup Fields
Example: Filtering Junk Email Addresses
Suppose your data stewards maintain a list of invalid emails in an Excel file. By ingesting this data from the Excel file into Timextender, we can get a list of the Junk Email Addresses that we would like to exclude from our main table.
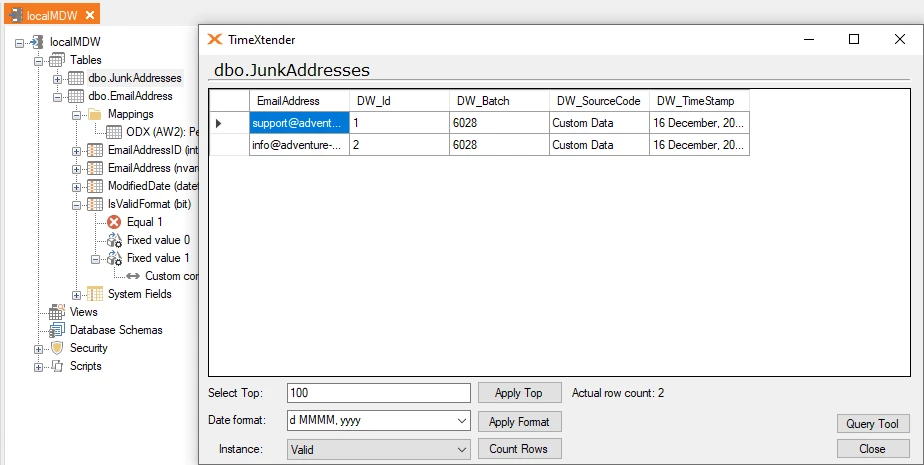
To validate against this list:
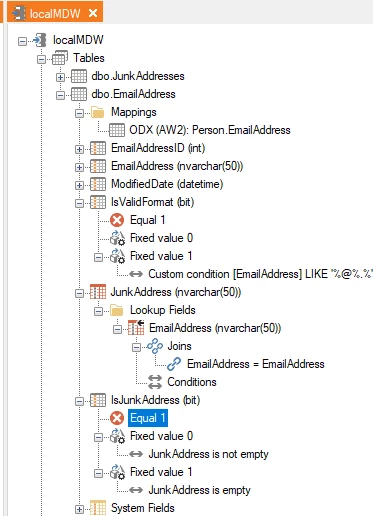
- Add a Conditional Lookup by dragging the field from the JunkAddresses onto the EmailAddress table, selecting the fields needed for the join and clicking OK. Rename the conditional lookup field JunkAddress. The conditional lookup field will show the records containing junk addresses.
- Then add a new boolean field similar called IsJunkAddress, by right-clicking the table and selecting Add Field.
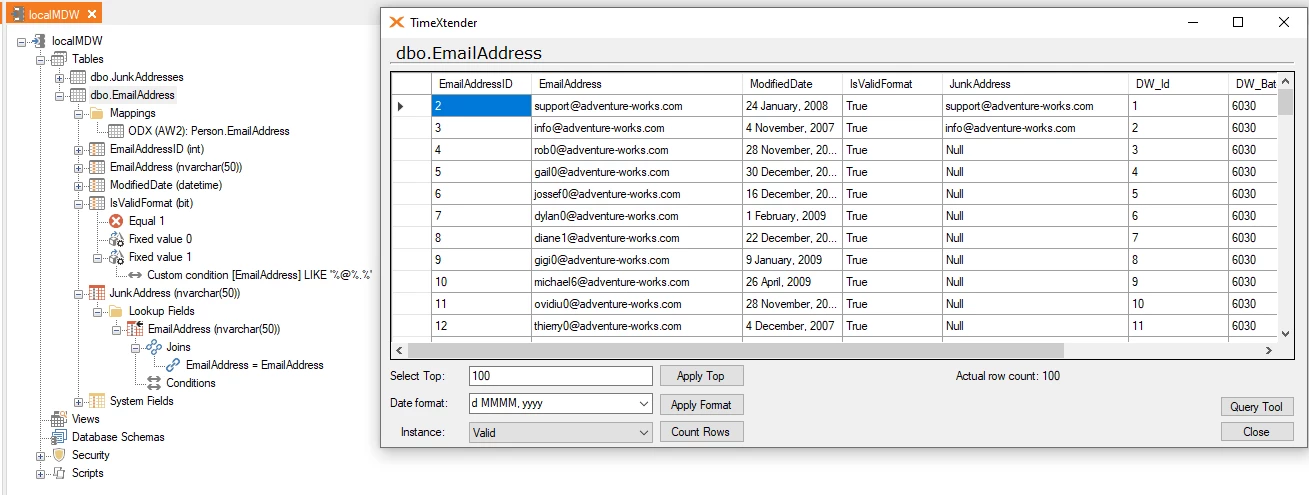
- Right-click the IsJunkAddress field and add 0 and 1 as fixed value transformations. Right-click the fixed value 1 transformation and click Add condition
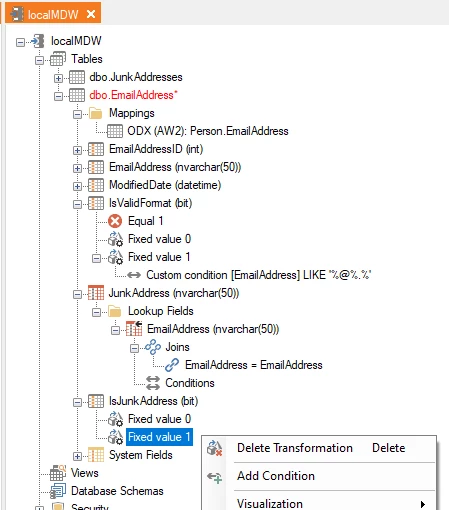
- Select the field JunkAddress and operator Is empty and click Add
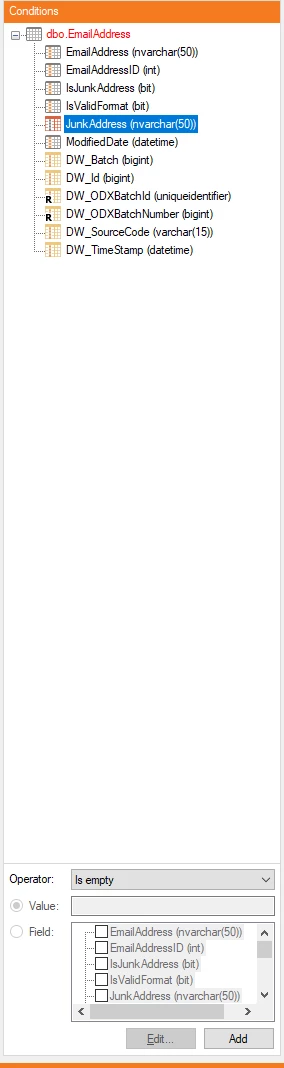
- Right-click the fixed value 0 transformation and click Add condition. Select the field JunkAddress and operator Is not empty and click Add
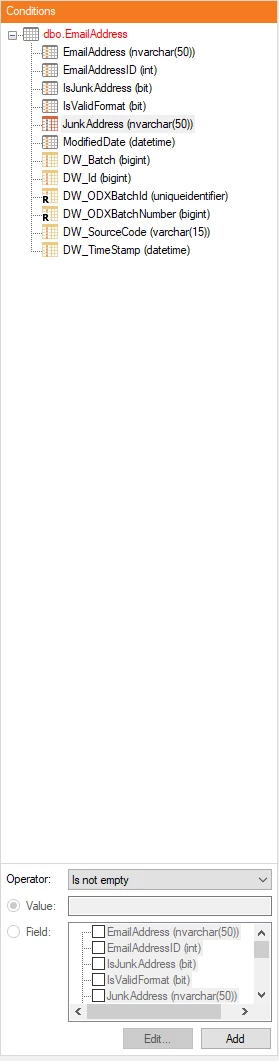
- Right-click the IsJunkAddress field and select Field Validations. Enter 0 as the value and click Add. This means that all records with a value of 1 in this field are to be considered valid (i.e. the records where JunkAddress is empty, in other words is not a junk address), and any other value is to be considered an error
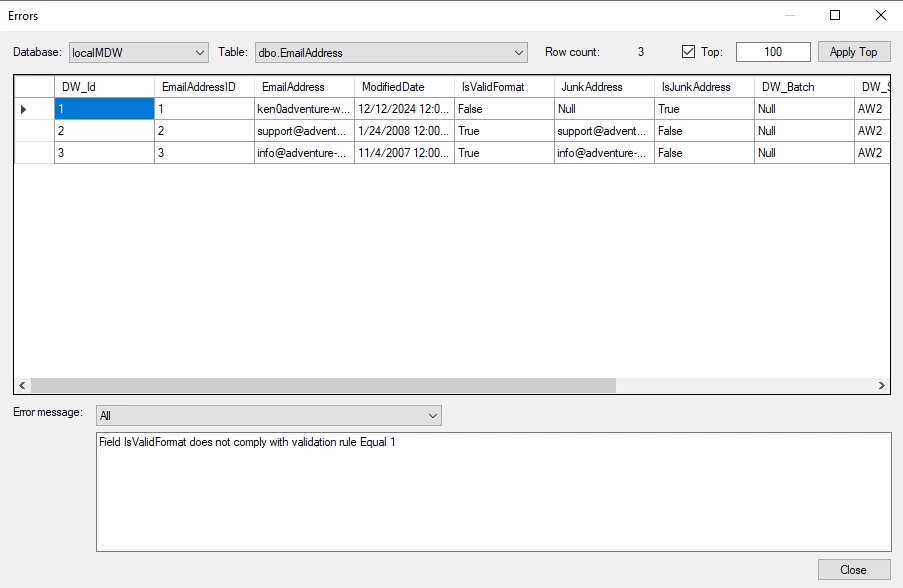
- Deploy and execute the table. Preview the errors under the Reports > Errors. These records will be excluded from the valid table
Custom Transformation Flags
Example: Expiring Old Data
Some scenarios require dynamic logic, such as expiring records based on age and other criteria. For instance:
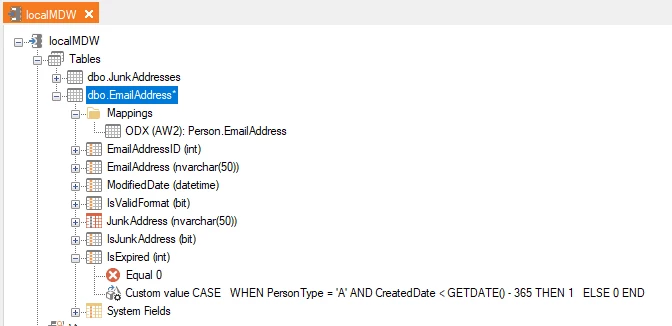
- Add a custom integer field, called IsExpired
- Apply a custom field transformation on the new field to dynamically calculate expiration based on conditions, such as:
Discussed in the community
Looking for related questions…
Didn't find your answer? Ask the community about this page — questions are answered by Timextender experts, partners and other users.