Building a Parent-Child Dimension in Timextender Classic
A parent-child dimension is a specialized structure that establishes hierarchical relationships between dimension members using two key columns in a dimension table. These relationships are defined through:
- A member key column that uniquely identifies each member
- A parent key column that identifies the parent of each member
Creating a Parent-Child Dimension
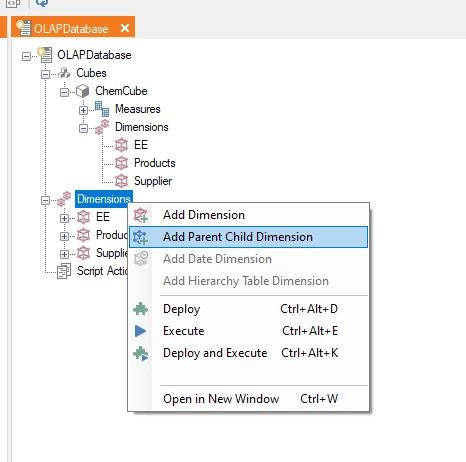
Step 1: Access the Dimension Settings Navigate to the Cubes tab and locate the Dimension node. Select "Add Parent Child Dimension" from the available options.
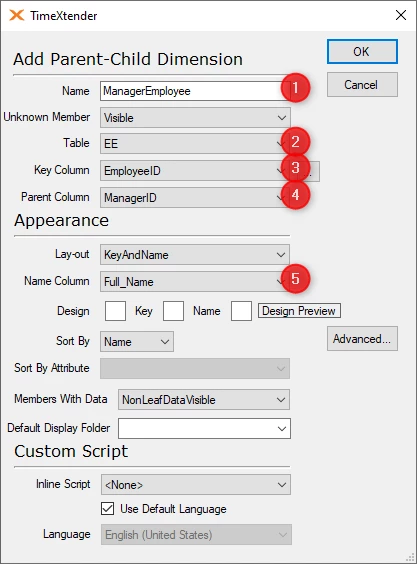
Step 2: Configure Dimension Properties Configure the following essential properties:
- Dimension name
- Source Data Warehouse table
- Member key column selection
- Parent key column selection
- Appearance settings
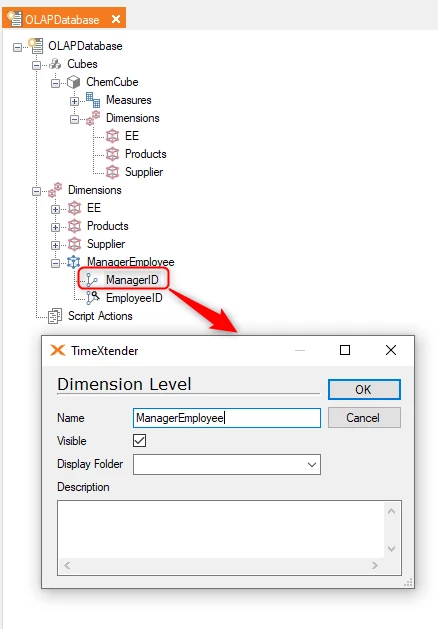
Step 3: Level Structure The dimension automatically creates two levels:
- Member Key level
- Parent Key level
Step 4: Rename the Parent Key Level For better organization, rename the Parent Key level to match the parent-child dimension name, as this level contains the actual hierarchical structure.
Step 5: Finalize Complete the setup by deploying and executing the dimension.
Best Practices
When implementing a parent-child dimension, ensure your source table contains clear hierarchical relationships. For example, an employee table with reporting relationships makes an ideal candidate for this type of dimension structure.
Discussed in the community
Looking for related questions…
Didn't find your answer? Ask the community about this page — questions are answered by Timextender experts, partners and other users.