Step 3 - Create Product Table from Excel file
In this step, you are going to continue with exMonDM and build out your first project. Specifically, you will be importing a table containing all the Adventure Works products. Creating a Table from an Excel file is easily done with the Create Table Wizard.
Note
Download the attached project file to your Computer
Import Table from Excel or Flat File
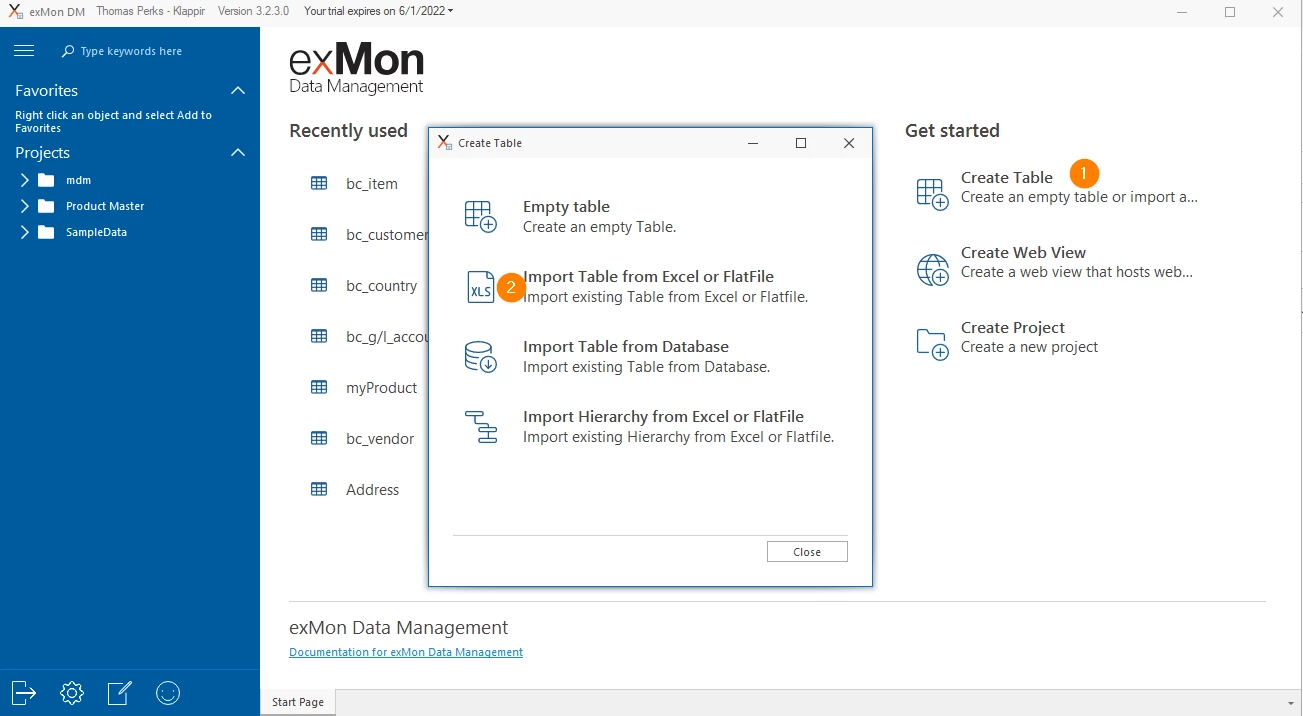
- Click on Create Table from the Start Page
- Import Table from Excel or FlatFile
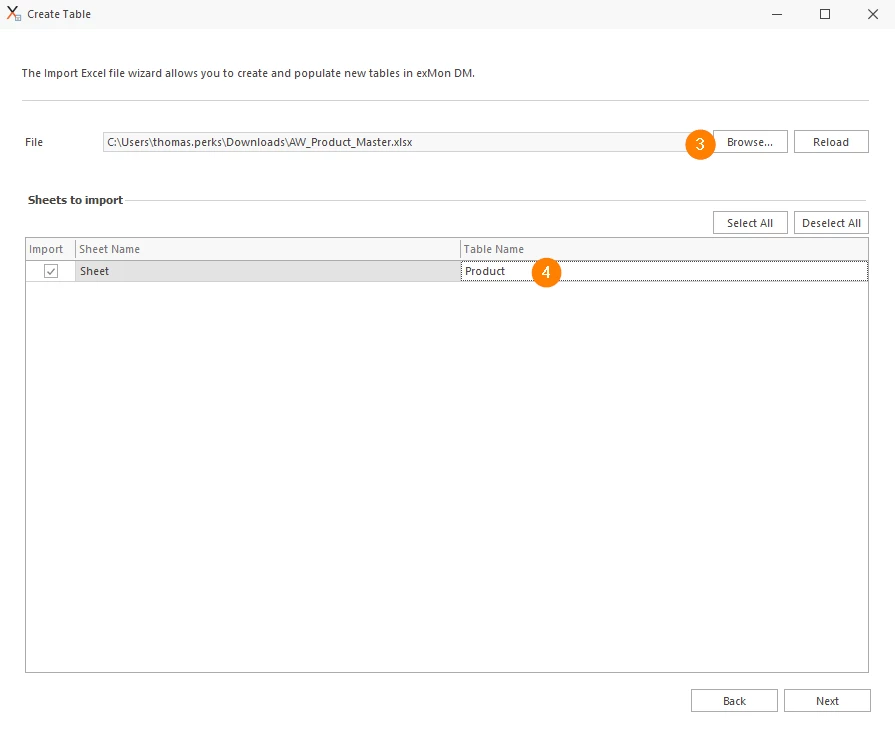
- Click Browse.. and navigate to the downloaded file.
- Modify the Table Name to Product and Click on Next
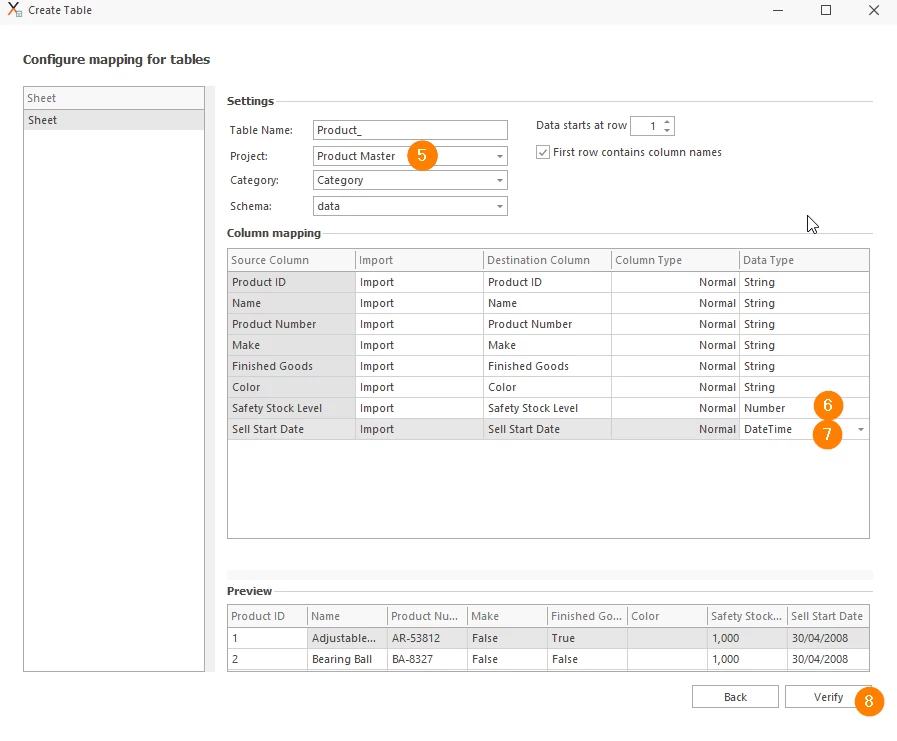
- Change the configuration mapping
- Change the Project to Product Master
- Change Datatype of Safety Stock Level to Number and Sell Start Date to DateTime.
- Click Verify to go to the Next Step
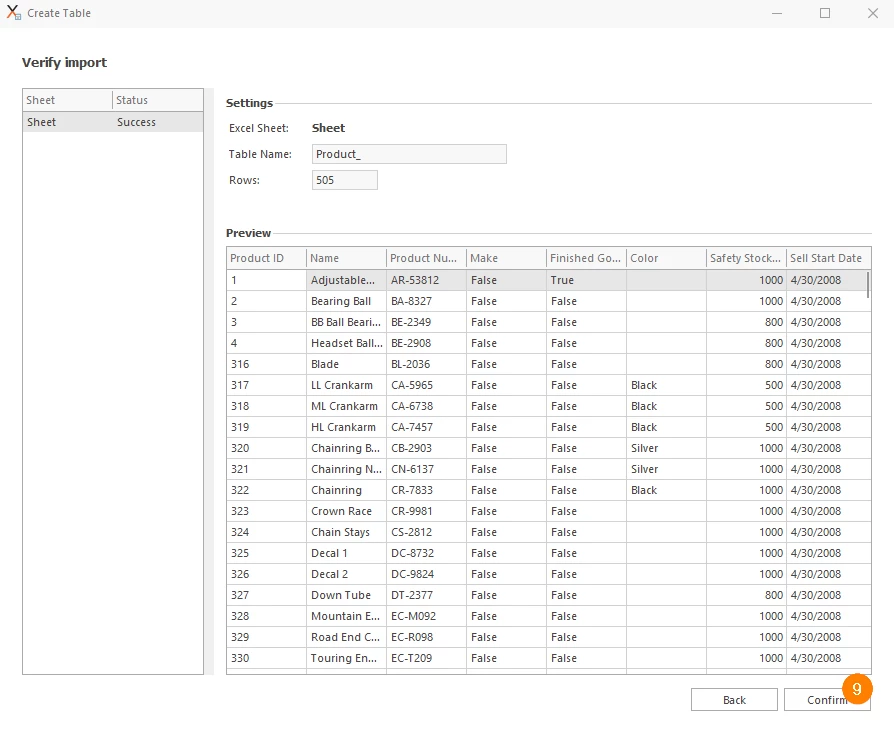
- If all looks good click on Confirm to start importing
-
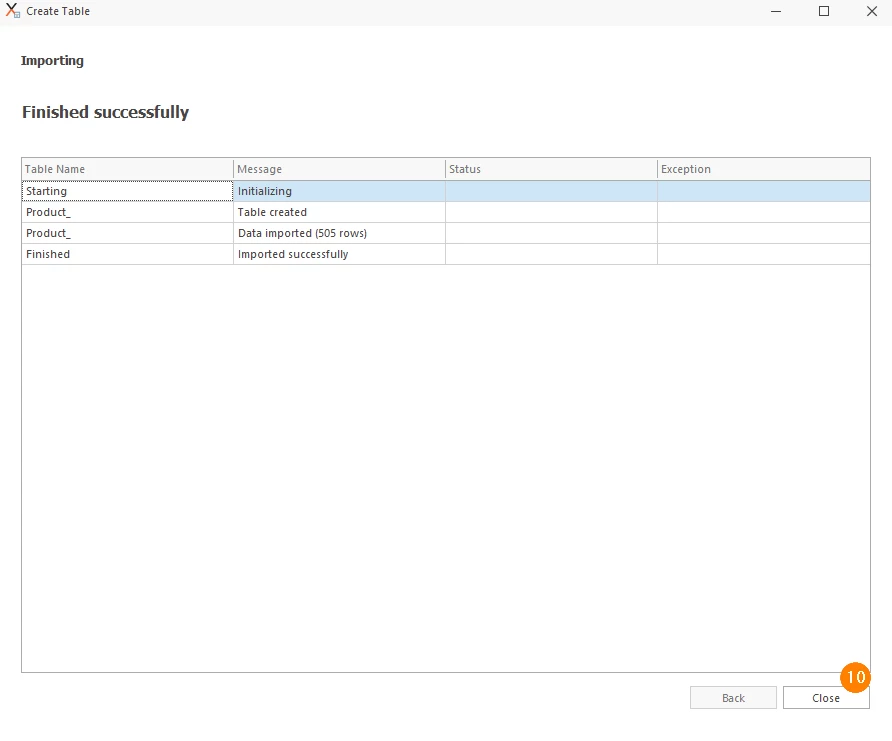
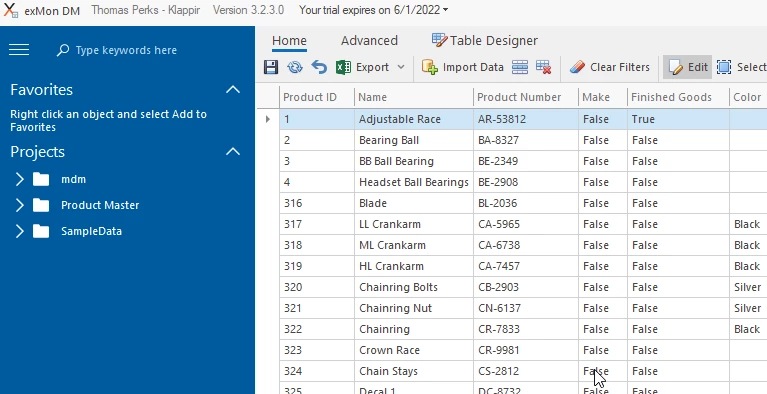
Import should now be final, click on Close and imported data should be visible in the table.
Next steps
To continue with this training, click here.
Downloads
Discussed in the community
Looking for related questions…
Didn't find your answer? Ask the community about this page — questions are answered by Timextender experts, partners and other users.