SSAS Perspectives
Note
Perspectives apply to Tabular endpoints only.
Tabular models can become complex with numerous tables, fields, and measures, making it challenging for users of analysis and visualization tools to maintain an overview and quickly locate specific objects they need. To address this, SSAS Perspectives are introduced as a subset of objects within a tabular model that users of tools like Power BI, Excel, and others can apply to simplify their interaction with the model.
A SSAS perspective represents a focused subset of objects in a tabular model that relates to a specific area. For instance, you can create a "finance" SSAS perspective that includes all objects related to finance. When this perspective is utilized in front-end tools, any objects outside this subset will be hidden, providing a streamlined view for users.
Add or Edit a Perspective
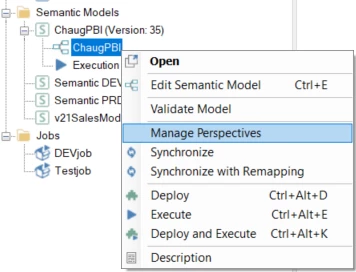
Expand the instance, and right-click on Deliver instance model. Select Manage Perspectives.
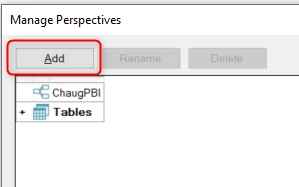
Click on Add in the Perspectives window to create a new perspective.
Rename a Perspective
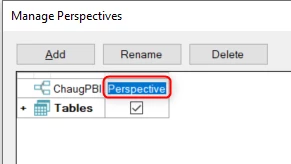
Double-click the Perspective header to rename it, e.g., "Finance Model".
Adding Objects to a Perspective
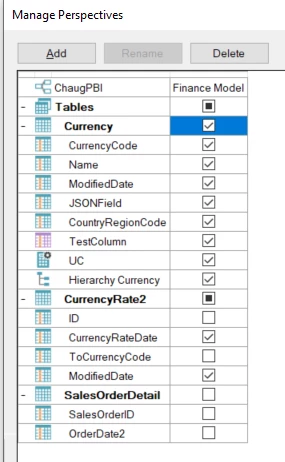
Select the checkboxes for the objects you want to include in the perspective.
Note that when all objects in a table are selected, the table is marked with a checkmark. If only some objects are selected, the table is marked with a dot.
Click OK after selecting the objects.
Deploy and execute the Deliver instance for the SSAS perspective to take effect.
Using the SSAS Perspective in a Front-End Visualization Tool
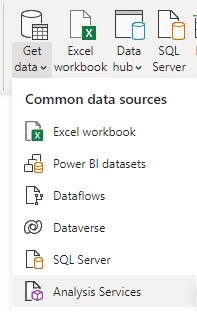
Power BI
Select Get Data > From Analysis Services
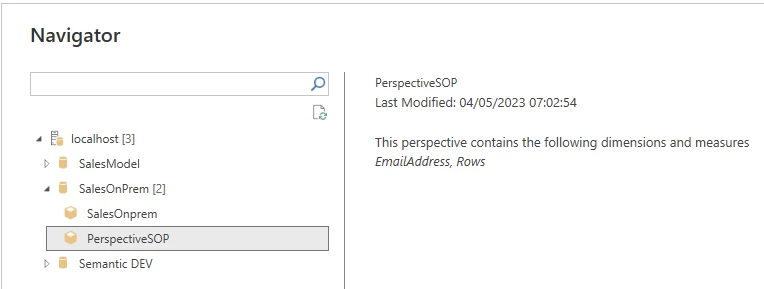
Enter the server name and credentials, then select the SSAS database and perspective. Click OK.
Excel
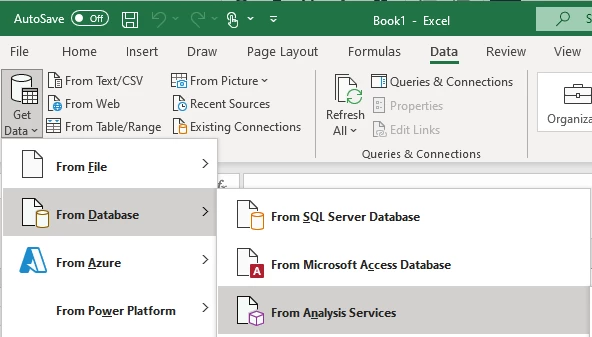
Select Get Data > From Analysis Services
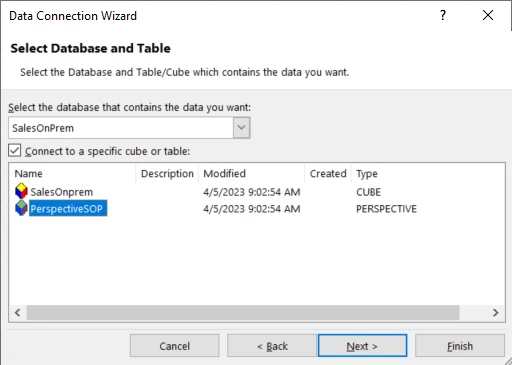
Enter the server name and credentials, then select the SSAS database and perspective. Click Finish.
SSMS
Browse the SSAS database in SSMS
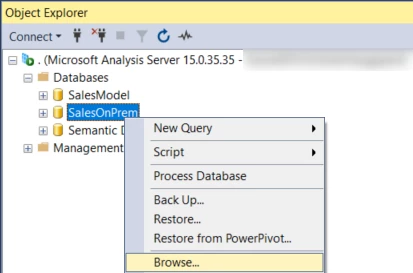
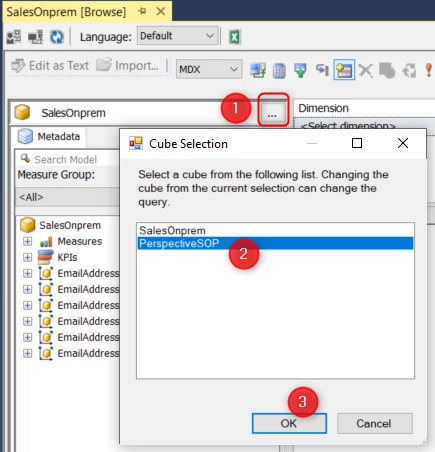
Click the three dots next to the SSAS database in the Browse tab, select the SSAS Perspective, and click OK.
Troubleshooting
Error
No data fields are available in the OLAP cube
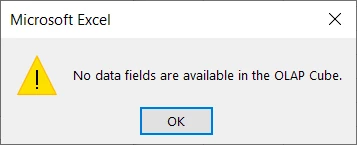
To resolve this error, ensure that a measure is selected in the SSAS perspective.
Discussed in the community
Looking for related questions…
Didn't find your answer? Ask the community about this page — questions are answered by Timextender experts, partners and other users.