Deliver Instance
Creating curated data marts, and adding endpoints to a Deliver instance.
In this module: creating a semantic model · role-playing dimensions · date hierarchy
What is a Deliver instance?
A Deliver instance is where prepared data becomes business-ready semantic models for analytics tools, so users always get consistent, governed, easy-to-understand outputs. It is the final layer in the architecture, and where you publish curated datasets.
In the Portal, go to Data Estate → Instances, choose Add new instance → Add deliver instance, and fill in the instance name, description and log retention. The critical step is configuring endpoints — selecting the types you need (Power BI, Tableau, Qlik, CSV, Tabular) directly in the setup form.
The process is deliberately low-code and form-guided, which centralises endpoint management and allows consistent deployment of semantic models to several BI environments at once. Once saved, the Deliver instance is immediately available in the Desktop application for modelling.
The step-by-step creation is covered in the Portal module. Reference: Add Deliver Instances.
The semantic model
A semantic model is a business-friendly abstraction over your technical data infrastructure. It
translates complex structures into meaningful business concepts: instead of exposing raw tables,
columns and joins, users see familiar names like "Monthly Sales" or "Customer Lifetime Value" —
not FactSales.Amount or dimCustomer.ID.
Why it matters:
- Business-centric access. Removes technical barriers, letting business users work with data in their own language.
- One version of truth. Finance, sales and operations all use consistent definitions, calculations and dimensions, preventing "multiple versions of the truth".
- Data democratization. Reduces dependence on IT — teams explore, report and use trusted data products independently.
- Faster decisions. Consistent, findable data means faster reporting and quicker action.
- Governance built in. Rules and definitions are managed centrally, improving data quality, lineage and compliance.
Add the Order Date table to the sales model
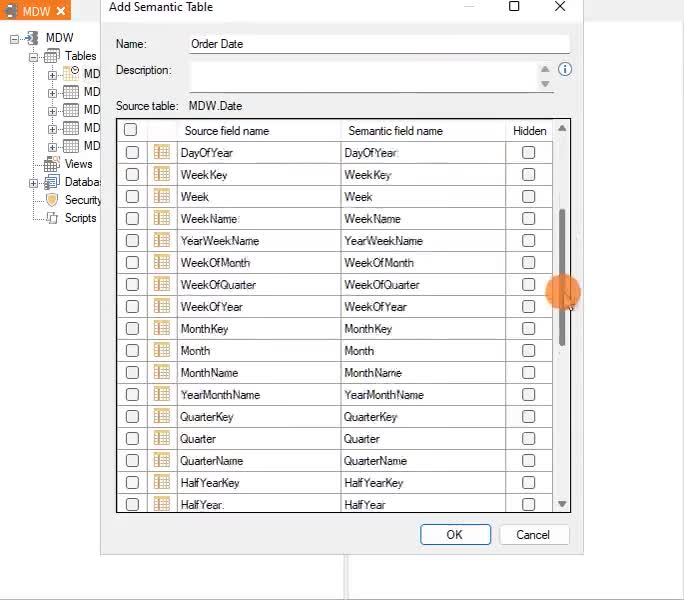
- From
MDW, drag theDatetable onto the Sales Deliver instance. - Name it
Order Date. - Select
DateValueand rename the field toDate. - Select
YearMonthNameand rename the field toMonth. - Select
YearQuarterNameand rename the field toQuarter.
Add the Ship Date table — a role-playing dimension
A role-playing dimension is one where the same dimension table plays a different role by
relating to a different foreign key on the fact table. Here, the date dimensions hold identical
data, but relating to ShipDate instead of OrderDate filters and shows different results.
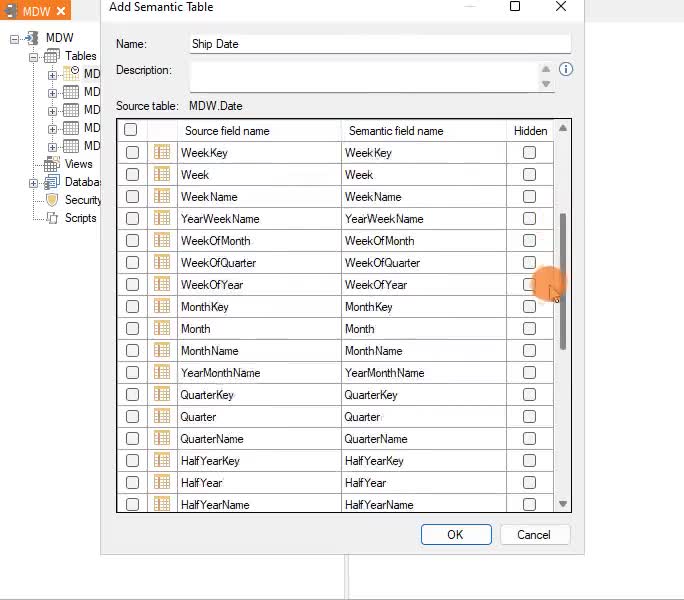
- From
MDW, drag theDatetable onto the Sales Deliver instance again. - Name it
Ship Date. - Rename
DateValuetoDate,YearMonthNametoMonth,YearQuarterNametoQuarter.
Add the Customer table to the sales model
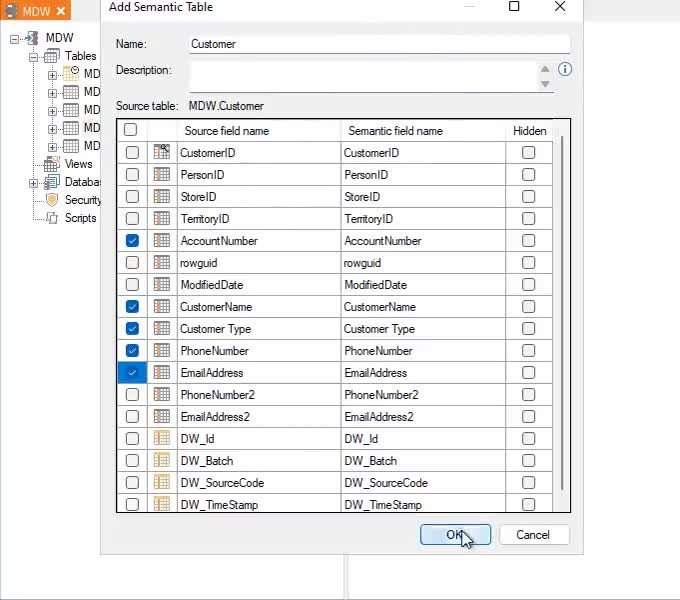
- From
MDW, drag theCustomertable onto the Sales Deliver instance. - Name it
Customer. - Select these fields:
AccountNumber,CustomerName,CustomerType,PhoneNumber,EmailAddress.
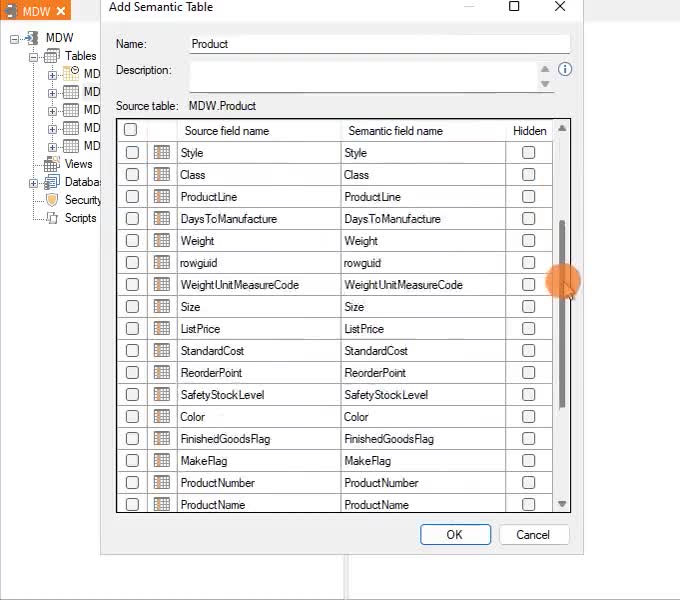
Add the Product table to the sales model
- From
MDW, drag theProducttable onto the Sales Deliver instance. - Name it
Product. - Select these fields:
ProductModelName,Color,ProductName,ProductCategoryName,ProductSubcategoryName.
Reference: Create a Role-Playing Dimension · Deliver instance relations · Measures · Custom measures
Next in the course
Semantic Model Endpoints · Data Cleansing
Discussed in the community
Looking for related questions…
Didn't find your answer? Ask the community about this page — questions are answered by Timextender experts, partners and other users.