Ingest Instance
The Ingest instance configures data sources and transfers data into Ingest storage.
In this module: what the Ingest instance is · Metadata Manager · Query Tool · Tasks in Ingest instances · Incremental load
What is the Ingest instance?
The Ingest instance is the first point of contact for incoming data. It copies raw data from sources into a designated storage area, so you keep control over your data, automate schema changes, and support incremental loading — only new or changed records are ingested.
1 · Data source configuration. Opening the Ingest instance in Timextender Desktop lets you configure your data sources — selecting tables and fields for ingestion, identifying primary keys, configuring incremental load, and scheduling recurring transfers.
2 · Data transfer. The Ingest Server service is controlled remotely from the desktop client to move data from the source into Ingest storage, using one of many ADO.NET providers or Azure Data Factory. Incremental load ensures only new and updated rows are loaded.
3 · Raw data storage. You can configure either an Azure Data Lake or a SQL database for the initial storage of raw source data. The Ingest instance automatically handles changes in the source schema by creating a new version of the target table to match, keeping the old version by default.
The Ingest instance never forgets
Unless you set up a task to remove older versions, every load is kept in your data lake or SQL storage. Each load is tucked away in long-term storage, so past data remains available. To free up space by removing previous versions, configure a Storage Management Task — see Tasks in an Ingest Instance.
Metadata Manager
To transfer data from a source into Ingest storage, you first establish which tables and columns exist in the source and which of them you want. That process is called synchronizing metadata, and it has three steps:
| Step | What it does |
|---|---|
| Import metadata | Extracts a one-to-one copy of the source metadata and stores it in Ingest storage as a cache. |
| Synchronize metadata | Reconciles the imported cache with the working copy in the Ingest instance, handling schema drift. |
| Select tables | Curates the list of tables available for selection in Transfer tasks. |
Synchronizing metadata and selecting tables
- Right-click the data source in TDI and click Metadata Manager.
- Click Synchronize Metadata.
- Review the synchronization results.
- Select the check box for every table you want to ingest. All of a table's columns are selected by default; unselect them as needed.
- When you are ready to commit, click OK.
- In the Review your selections window, clear the checkbox for any change you do not want to commit, then click Commit. This updates the working copy of the metadata.
Handling schema drift
The Metadata Manager lets you handle schema drift without breaking table and field mappings to the Prepare instance. When a synchronization detects metadata changes, you do the remapping in the tool.
After synchronization, review the Status column:
| Status | Meaning |
|---|---|
| Blank | No changes detected, or the table has been edited (which clears the status). |
| Green check | Changes detected and fixed automatically. |
| Yellow | Changes detected that require review. |
| Red | The application could not map a table or column in the working copy to one in the cache. Manual remapping required. |
For each table needing review, select it and click Edit. In the window that opens you can:
- Click the Data Source Table list and choose a table, to map the table you are editing to a different table in the data source. Useful when names changed in a way the application could not fix automatically.
- Under Fields, click the Data Source Table list and choose a field name, to map that field to a different field on the source table.
- Review the detected changes in the box next to the Fields list.
See also Metadata Manager in the reference documentation.
Query Tool
The Query Tool lets you query the data source directly, before transferring any data — very useful during initial data discovery.
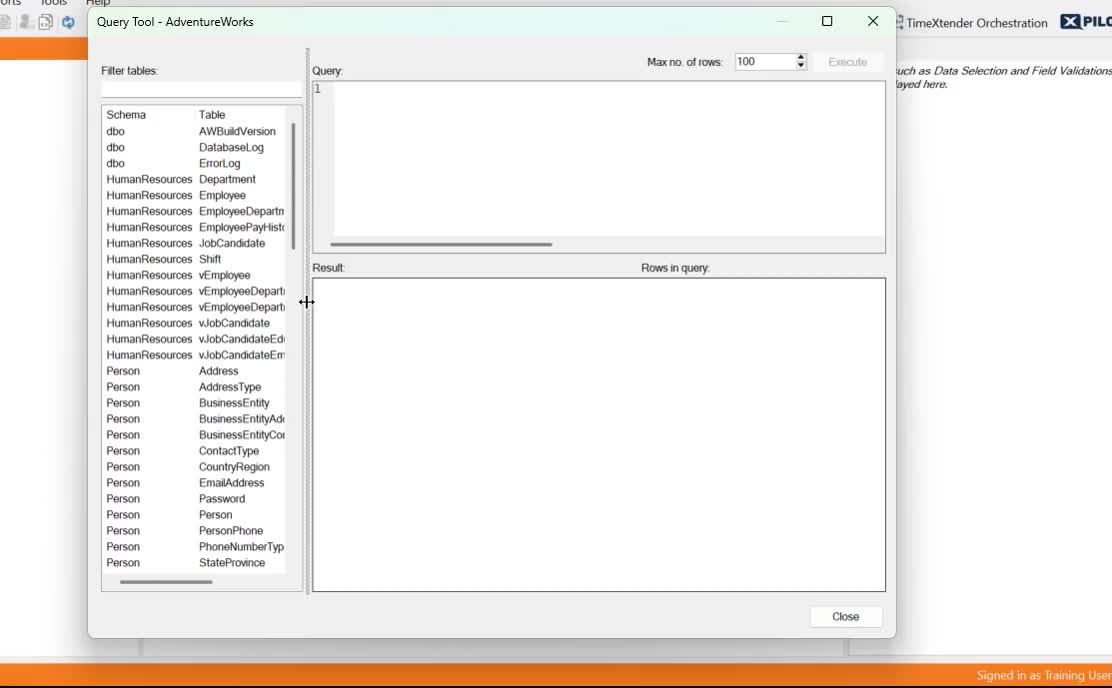
- Right-click the data source and choose Query Tool.
- Find your table and drag it into the query window.
- Click Execute.
- Review the results.
Validate a primary key
This query counts the rows in the table and compares that with the number of distinct primary key values — if they differ, the column is not unique.
SELECT
    COUNT(*) AS [RowCount],
    COUNT(DISTINCT [BusinessEntityID]) AS [DistinctBizEntityID]
FROM [HumanResources].[vEmployee]
Select primary keys
A primary key is a field, or set of fields, that uniquely identifies each record in a table. In Timextender a primary key must be identified on any table where you want incremental load. Timextender identifies primary keys automatically during Synchronize task execution on supported data sources.
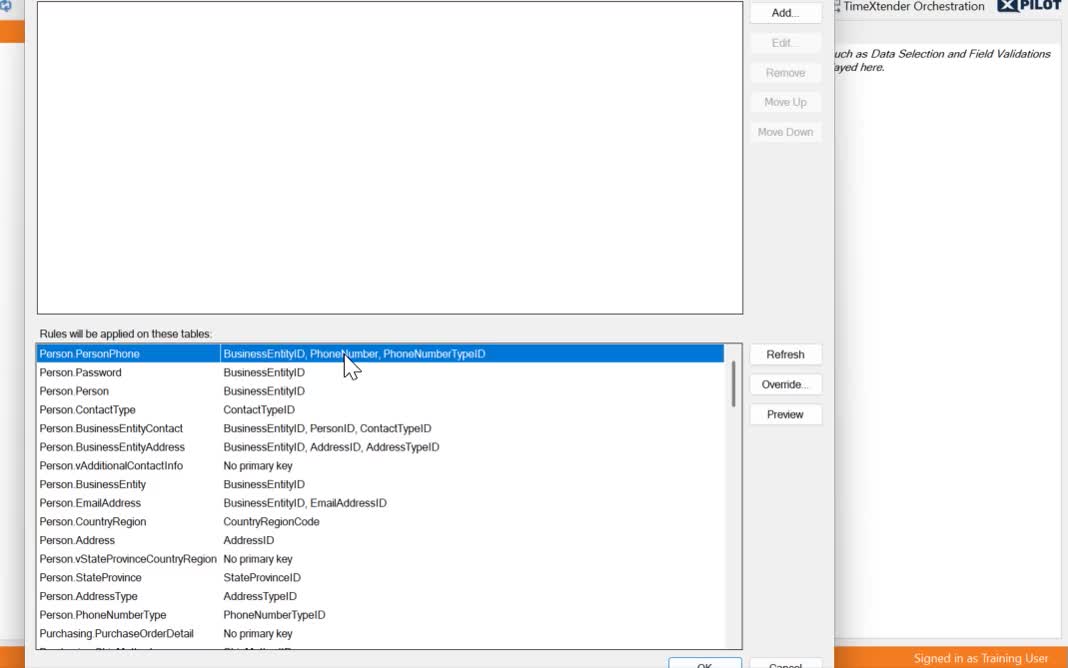
- Right-click a data source and choose Set Up Primary Keys.
- Select a table without a primary key.
- Click Override.
- Identify and select the primary key.
- Click OK, and repeat as necessary.
Tip
You can identify primary keys on many tables at once by adding your own rules — see Set up Primary Key Rules on an Ingest Instance Data Source.
What is incremental load?
Incremental load saves significant time and resources by loading only new and changed source records. It requires a reliable primary key and an incremental value column — a field on the source table, often a date, indicating when the row was created or changed.
1 · Initial full load
The first execution after incremental load is configured loads every available row in the data source.
2 · Identify max incremental value
Timextender finds the largest incremental column value in the source and stores it for the next step.
3 · Incremental load
Subsequent loads transfer only the rows where the incremental value column is greater than the previously stored maximum.
Configure incremental load
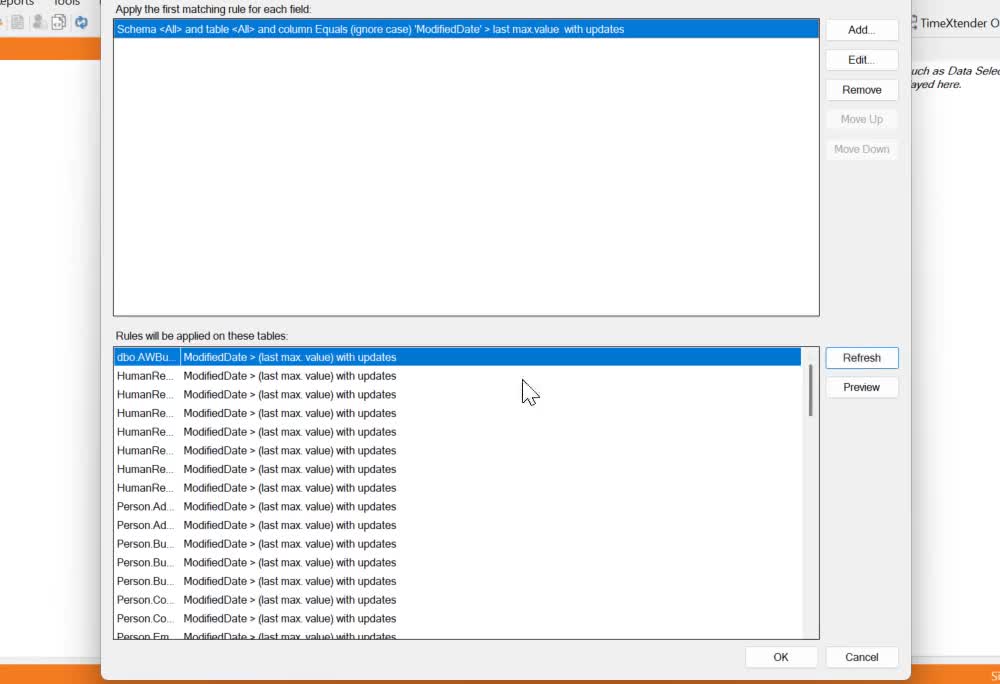
- Right-click the data source and choose Set Up Incremental Load.
- Click Add.
- Set Column > Equals (ignore case).
- Enter
ModifiedDate. - Check Handle Primary Key Updates. This ensures records matching a previously loaded primary key are updated in the data warehouse instance.
- Click OK.
- Click Refresh, then OK.
Rules apply broadly by default
Leaving the schema and table selections as <All> applies the rule to all schemas and tables.
"Subtract from value" incremental load
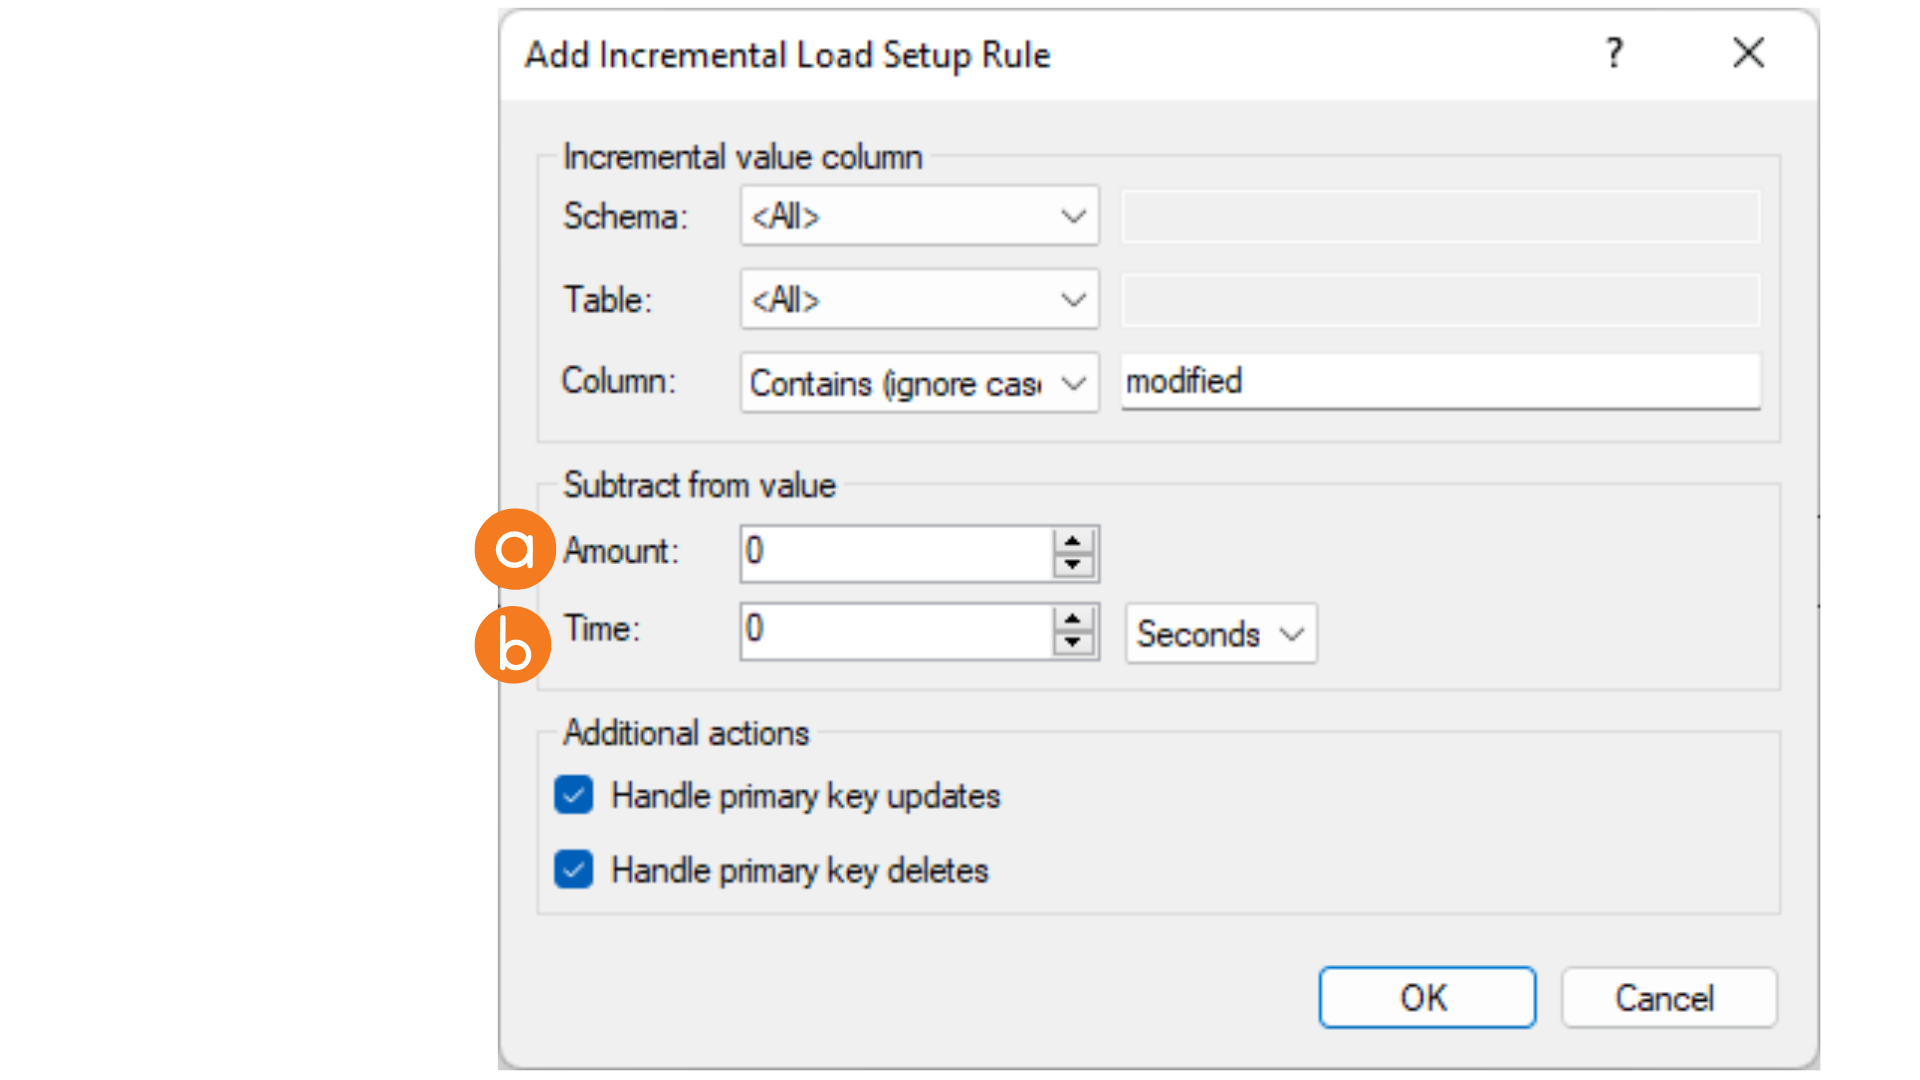
Subtract from value subtracts from ruled fields. Offset rules help with date and time fields: incremental loads then update by created date if the row was altered within the interval.
- Amount decreases a value.
- Time subtracts from the last DateTime, in seconds.
- Right-click the data source and choose Set Up Incremental Load.
- Click Add.
- Set Column > Equals (ignore case).
- In Subtract from value, enter the value to decrement on each incremental load.
- Complete the setup and click OK.
For more detail, see Incremental Load in an Ingest Instance.
Next in the course
Install & Configure · Portal · Prepare Instance
The exercise and quiz for this module are on the training site.
Discussed in the community
Looking for related questions…
Didn't find your answer? Ask the community about this page — questions are answered by Timextender experts, partners and other users.