Multiple Environments
How to create and configure environments, and migrate between them, so deployments across your organization are accurate, secure and traceable.
In this module: configuring multiple environments · instance migration · instance documentation · data lineage · meta collections
Why multiple environments?
Working in a single environment might seem simpler at first, but it creates significant risks as your organization becomes more dependent on data for critical business decisions. When changes are made directly to production data, you risk business disruption from broken data pipelines, or incorrect decisions based on wrong data — and a loss of trust in your data solutions.
A multi-environment setup eliminates these risks by creating controlled spaces for development, testing and production, so changes and experimentation happen safely without affecting business-critical reports.
| Environment | Purpose |
|---|---|
| Development | Developers can innovate, create and test in an isolated environment, eliminating risk to business processes. |
| User acceptance testing | Once tested by developers, new changes are migrated from Dev to Test. End users validate that modified pipelines work as expected; if not, feedback is provided and work continues in development. |
| Production | Once thoroughly tested, changes are migrated to Production where the improved data pipelines feed business-critical reports and processes. |
Maintaining identical copies of every data layer can be expensive and isn't always necessary. Timextender's modular, cloud-based instances enable flexible multi-environment topologies based on your organization's needs.
Example environment configuration
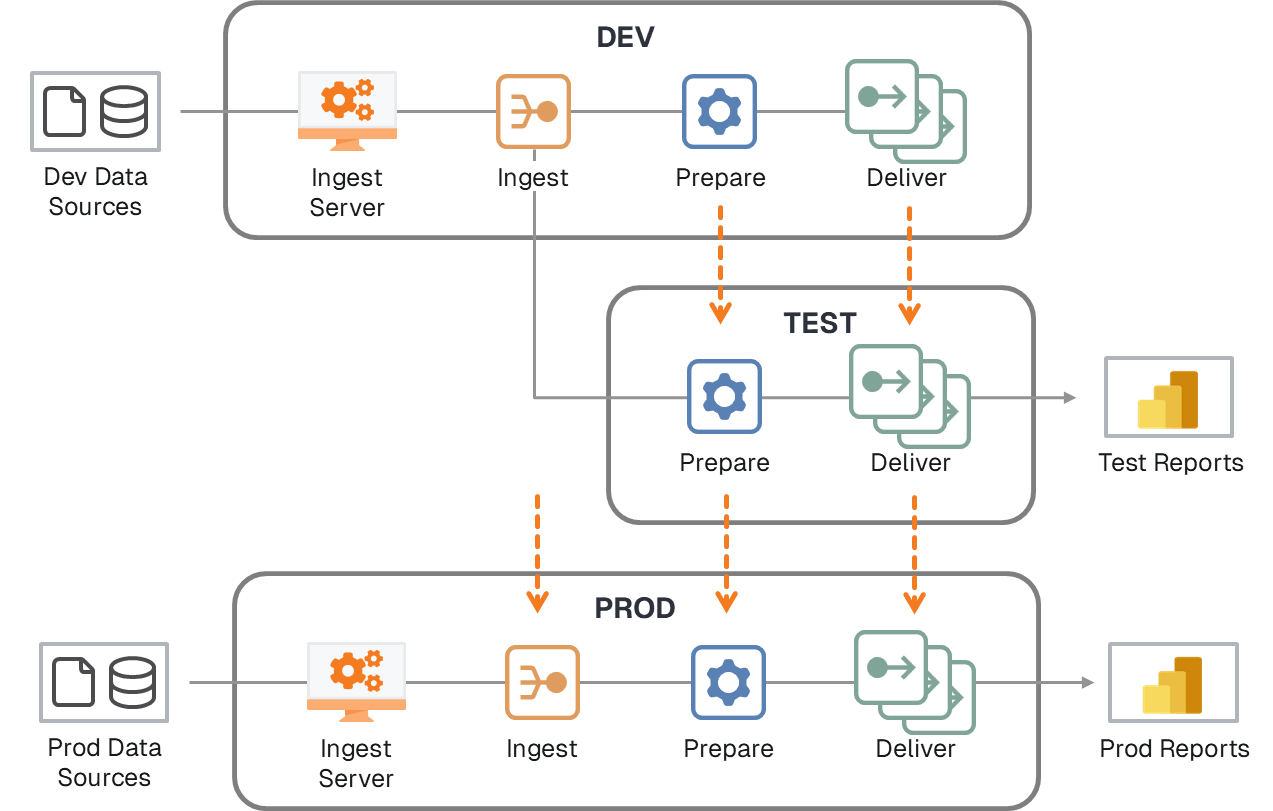
In the diagram above:
- Development and Production each have their own complete data pipeline (Ingest → Prepare → Deliver).
- The Test environment receives data from Development's Ingest storage.
- This provides "just enough" data validation without excessive duplication.
- It reduces storage costs while maintaining proper testing protocols.
Configure multiple environments
Use the Portal to add distinct environments for Development, Test and Production, and provision separate instances for each. Not all instances must use multiple environments, but you must have at least two of any instance type to use environment migration.
Create environments
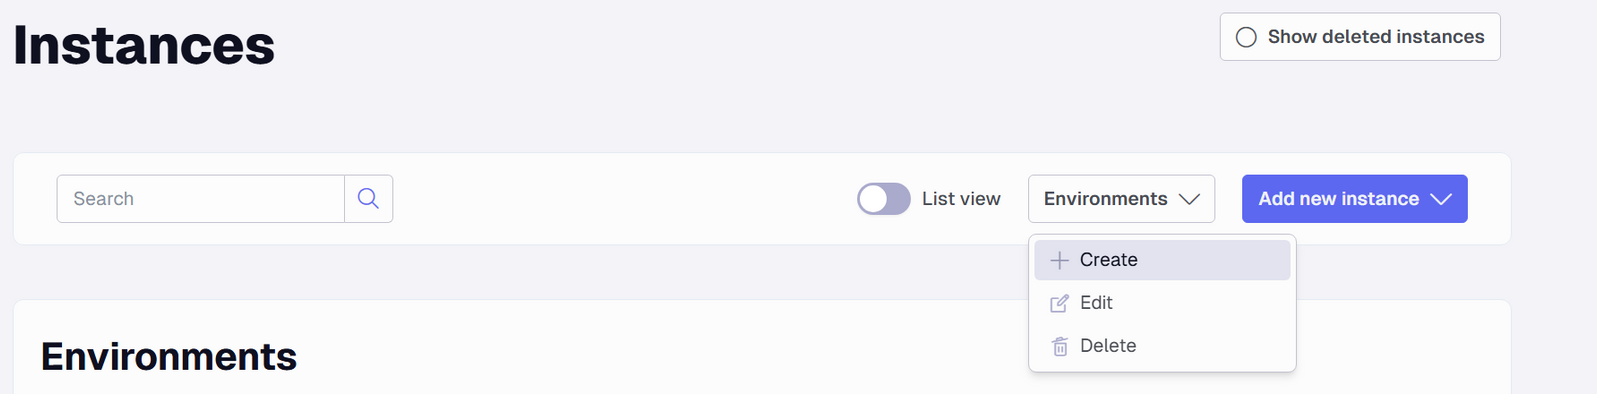
- In the Portal, go to Data Estate → Instances → Environments → Create.
- Create the
DEV,TESTandPRODenvironments.
Add instances to environments
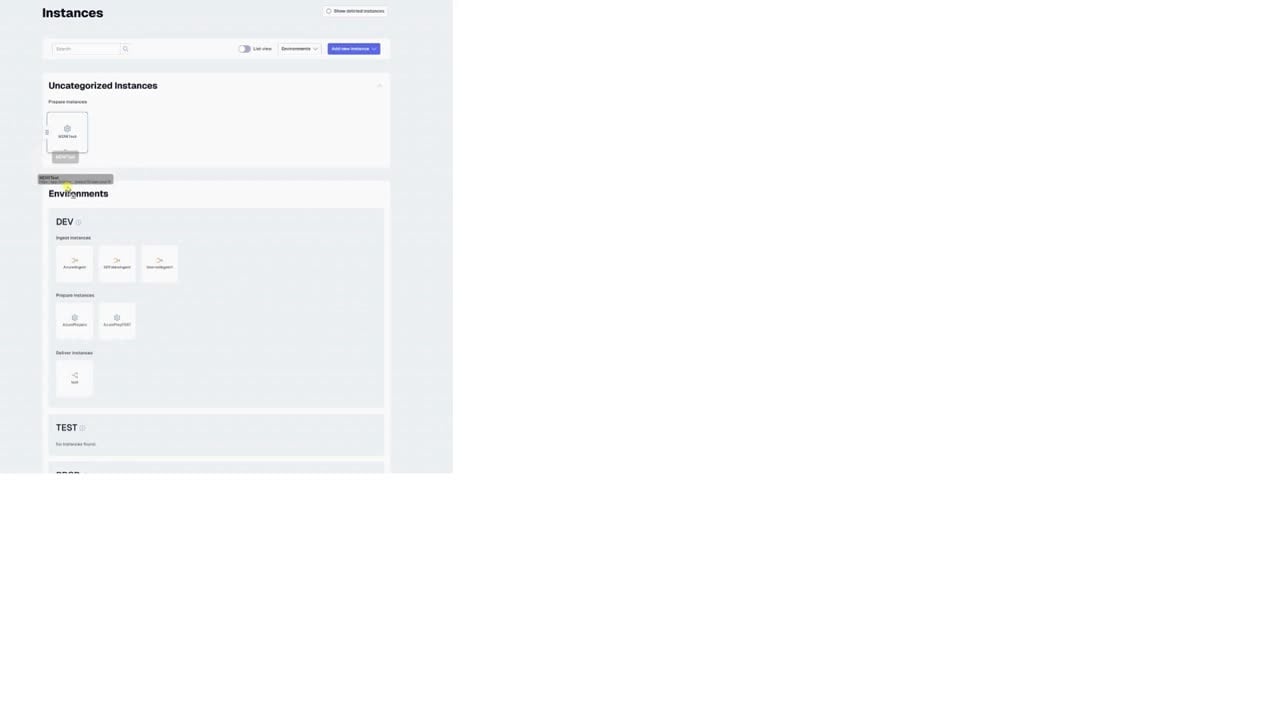
- In the Portal, go to Data Estate → Instances.
- Select the instance, drag it and release it onto the target environment.
Follow a migration procedure
If done improperly, migrating environments can introduce unwanted issues into your production environment. Defining and following an environment migration procedure ensures the proper steps are followed each time. The example below is a starting point — adjust it to align with your IT policies.
- Pre-promotion validation — confirm DEV tests are complete, dependencies are present, and report impacts are assessed.
- Controlled migration — ensure the target environment is idle, stop execution services to avoid conflicts, and run the migration with detailed comments.
- Post-promotion verification — validate changes immediately via reports or dashboards, monitor logs, and confirm full data loads.
- Final sign-off and archiving — collect stakeholder approval, communicate release completion, and attach artifacts to change records.
Instance environment migration
Before migrating from DEV to TEST, ensure all related work items are completed, saved and annotated with clear version notes. If your change set includes incremental tables with new fields or transformations, prepare a promotion-specific execution package during development that can be run in the target environment after promotion.
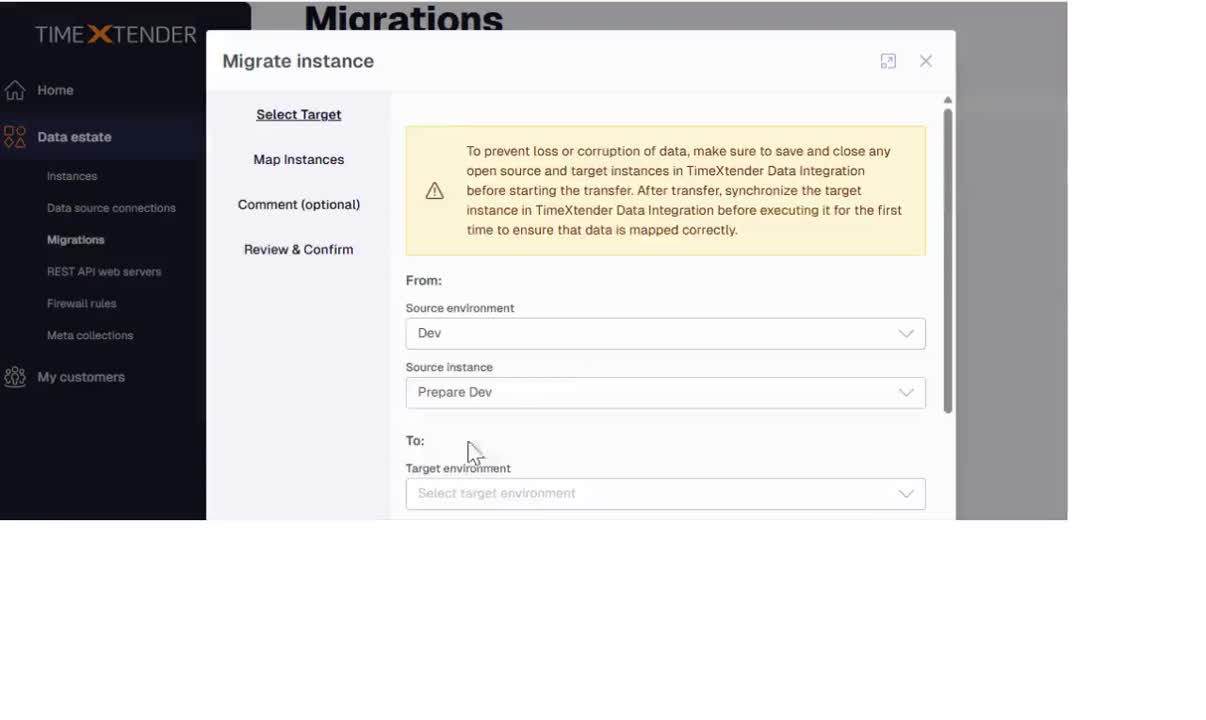
- From the Portal, navigate to Data Estate → Migrations.
- Click the arrow next to the instance you wish to migrate.
- Select the target environment and target instance.
- Click Next.
- Map the appropriate Ingest instance and click Next.
- Review and migrate.
Export deployment steps
After migrating your instance, and before you deploy any changes, Timextender makes it easy to document exactly what changed — for compliance, and for root-cause analysis in later troubleshooting. This export becomes your auditable record, showing scope, order and rationale for every change.
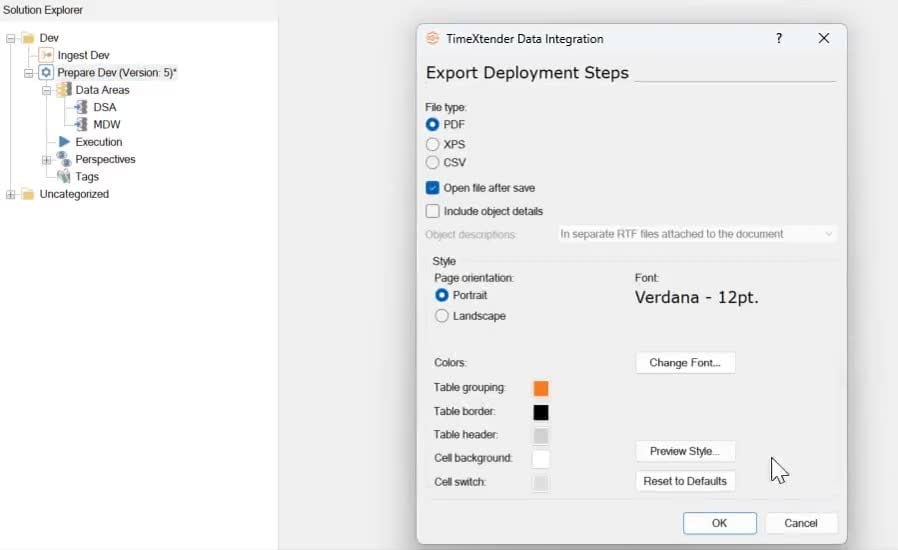
Export deployment steps from the Prepare instance
- In Solution Explorer, right-click the Prepare instance.
- Hover Advanced → select Export Deployment Steps.
- Under File type, choose CSV and check Open file after save.
- Click Export/OK and save the file.
- Open it, review the order and scope, then distribute to stakeholders or attach it to change records.
Deploy and execute in the target environment
Promoting changes into a new environment should never mean redeploying everything. Full deployments take longer, introduce unnecessary risk, and may update objects beyond the intended sprint scope. Focus only on the changes and scope you deliberately planned — that keeps your environment stable, your deployments predictable and your testing faster.
Differential deployment
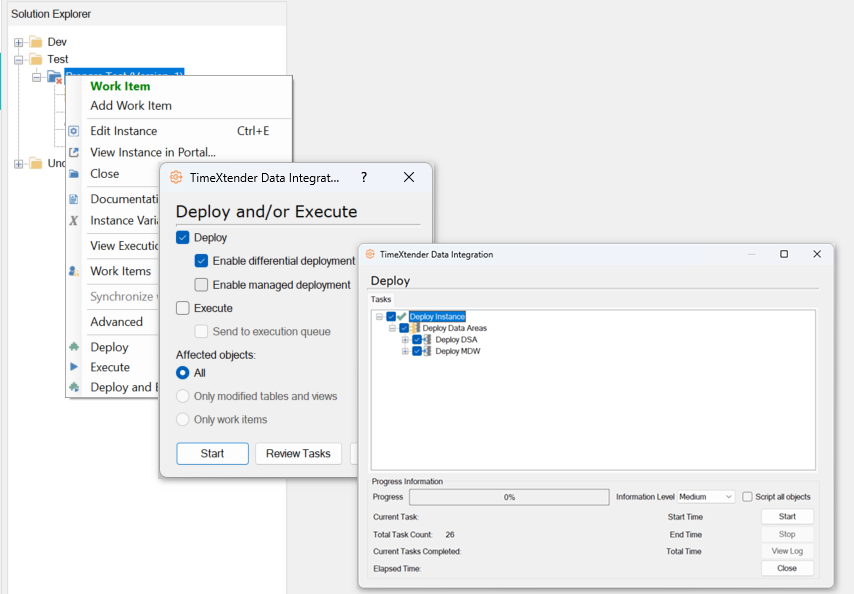
- In the Prepare instance, right-click → Deploy.
- Ensure Enable differential deployment is selected. Click Review Tasks.
- Review the pending change list and confirm scope. Click Start.
Perspective deployment
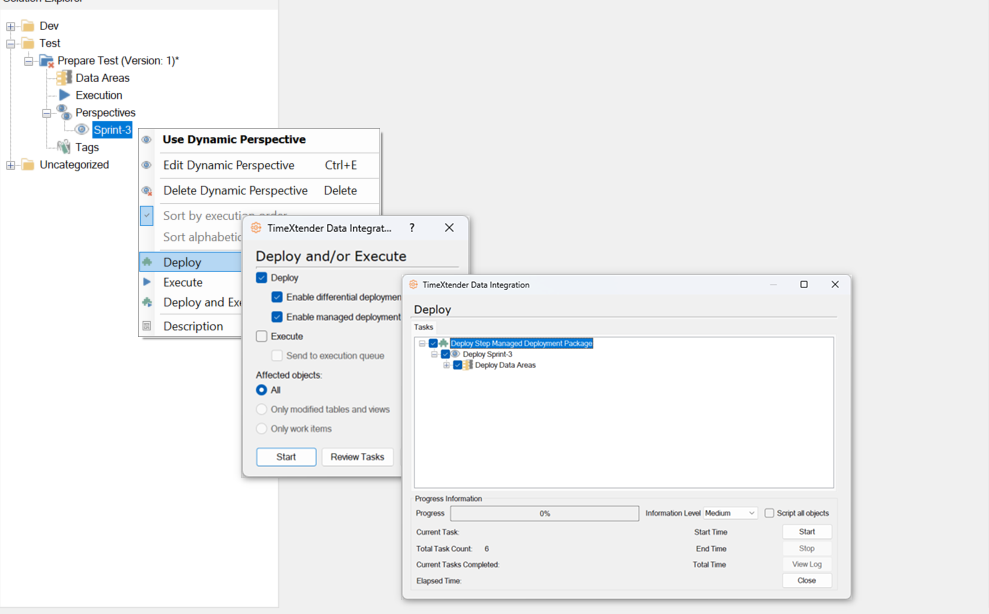
If you have made changes outside your sprint scope and would prefer not to deploy them, rely on the sprint perspective to deploy only the objects you want.
- In Solution Explorer, identify the perspective for your sprint scope.
- Right-click → Deploy.
- Ensure Enable differential deployment is selected. Click Review Tasks.
- Confirm only scoped objects are included. Click Start.
Execute your promotion-specific package
Once deployment is complete, execute the promotion-specific execution package you prepared during development. This ensures any impacted tables — particularly those requiring full loads — are refreshed immediately in the target environment. Without this step, your validation in TEST or PROD may be based on incomplete or stale data.
Related reference
- Agile Team Development — building the promotion plan during the sprint.
- Scheduled Executions — creating the packages you run after promotion.
- Portal — where environments and migrations live.
Discussed in the community
Looking for related questions…
Didn't find your answer? Ask the community about this page — questions are answered by Timextender experts, partners and other users.