Slowly Changing Dimensions
How to use Slowly Changing Dimensions (SCD) to track changes in the source data, so you keep both data accuracy and historical context.
In this module: history table setting · supernatural keys · surrogate keys
What are Slowly Changing Dimensions (SCD)?
In data warehousing, Slowly Changing Dimensions are how you track historical data that changes gradually over time.
Customer addresses are the classic example. When a customer moves and you update their billing address in your ERP or CRM, the old address may be lost if the source system doesn't retain it. That is a problem if you want to analyze historical data and see what a customer's address was at a given point in time. You want to keep the original address, the current address and any address in between — because business rules and a deeper understanding of the customer treat it as a dynamic, evolving entity.
That is what an SCD gives you: a record of the customer's address history, by creating a new "version" of the customer record that holds both the old and the new address. You can track changes over time and build accurate reports on historical data.
Timextender makes SCD straightforward for data engineers and analysts. History is how SCD is implemented in Timextender, and surrogate keys ensure uniqueness — which matters particularly when handling Slowly Changing Dimensions.

| Behavior | SCD type |
|---|---|
| Update | SCD Type 1 |
| Ignore | SCD Type 0 |
| Insert | SCD Type 2 |
History and types of SCD
History is a feature that tracks changes for tables. When history is activated for a table, Timextender compares the incoming records from the data source with the ones already in the data warehouse:
- If a new record is found, it is added to the warehouse.
- If a record with the same key exists, the system compares hashed versions of the two records to identify changes.
- If there are no changes, nothing is updated.
- If changes are detected, the action taken depends on the type of the field that changed.

Types of Slowly Changing Dimensions
| Type | Behavior |
|---|---|
| Type 0 (ignore) | Fields that are basically ignored by the history logic. |
| Type I (update record) | Fields overwritten with new data when the source changes — no history of the change is kept. |
| Type II (insert new record) | Fields that cause a new record to be created, creating history about the change. |
| Hybrid types | Type 6 or 7, accomplished by combining Type I, II and III for more flexibility than any one type alone. |
SCD Type I and II example
Source data — initial data from the source:

The address has changed in the source:

SCD Type I — Timextender keeps only the latest version of the address:

SCD Type II — Timextender keeps the old address record for historical reporting and creates a new record for the new address. Date fields specify the time interval during which a record is valid, and a flag tells you which record contains the current address:

Enable history and natural key
- In the DSA, right-click the
Customertable and choose Table Settings. - Go to the History tab and tick Enable History.
- Go to the Data Extraction tab, remove the tick at Truncate valid table before data cleansing and click OK.
- Expand the table. Note the History Settings folder with new fields, and the History Settings
pane on the right.
CustomerIDis chosen automatically as the natural key, because it is the primary key in the table. - Deploy and execute the
Customertable without changing the settings. This ensures no rows are deleted from the table and there is only one row per occurrence of each natural key value.
Enable SCD: Type I and II
The example below highlights SCD Type I and II. When the source data changes, the customer name is updated, and the email address retains its history in the DWH.
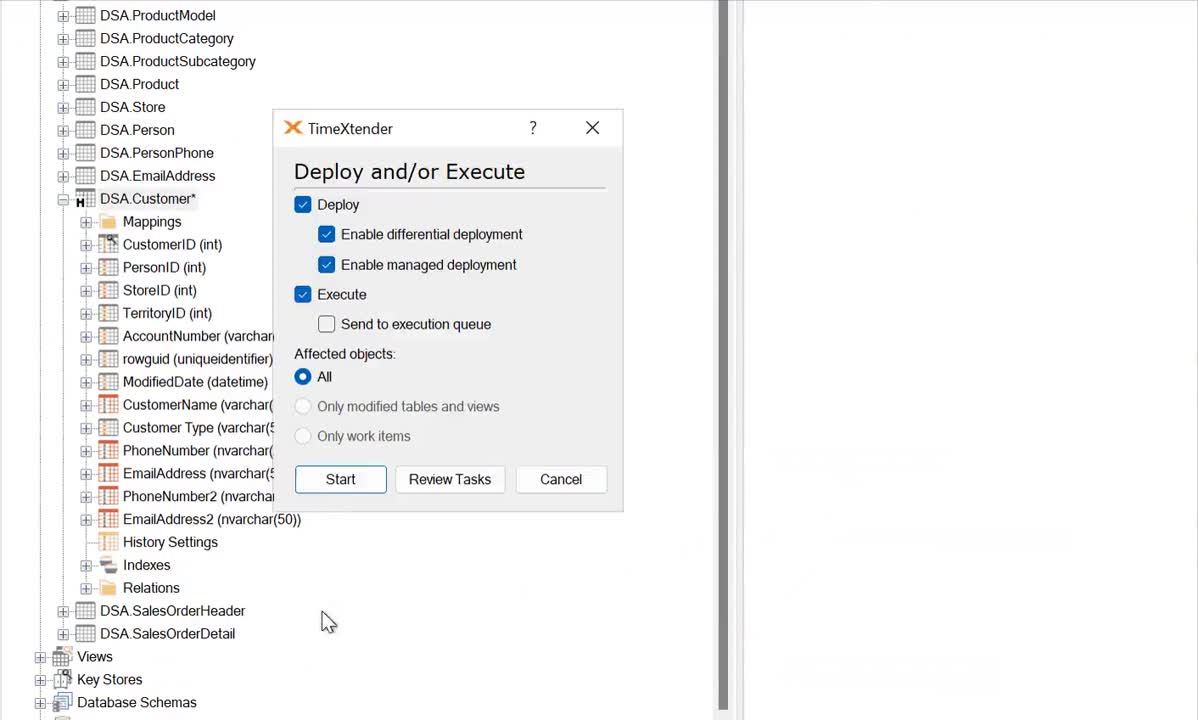
Enable Type I and II for the Customer table
- In the DSA, expand the
Customertable and select History Setting. - Select
Customer Nameas a Type I field, and tick the checkbox forEmailAddressas a Type II field — or select as desired. - Deploy and execute the
Customertable.
Supernatural keys
Supernatural keys are durable, independent keys that remain unchanged — unlike natural keys such as customer numbers. To create one, a hashing algorithm is applied to other fields in the table and the resulting hash is compared against the values in a key store table. If the hash exists, the corresponding key value is returned; otherwise a new key value is generated.
The key store ties the supernatural keys together and should be used consistently for related tables. You can choose to read only from the key store if you don't want to create a new entry. Changing the hashing algorithm may affect performance and break existing data, so Timextender recommends SHA-1 SQL Server 2005+ for most hashed fields.

Supernatural keys offer better performance, robustness and quicker processing, and they handle
early-arriving facts efficiently. However, when dealing with Slowly Changing Dimensions with Type II
fields, you must use DW_Id instead of supernatural keys.
Add Product_Key as supernatural key
Add a supernatural key field
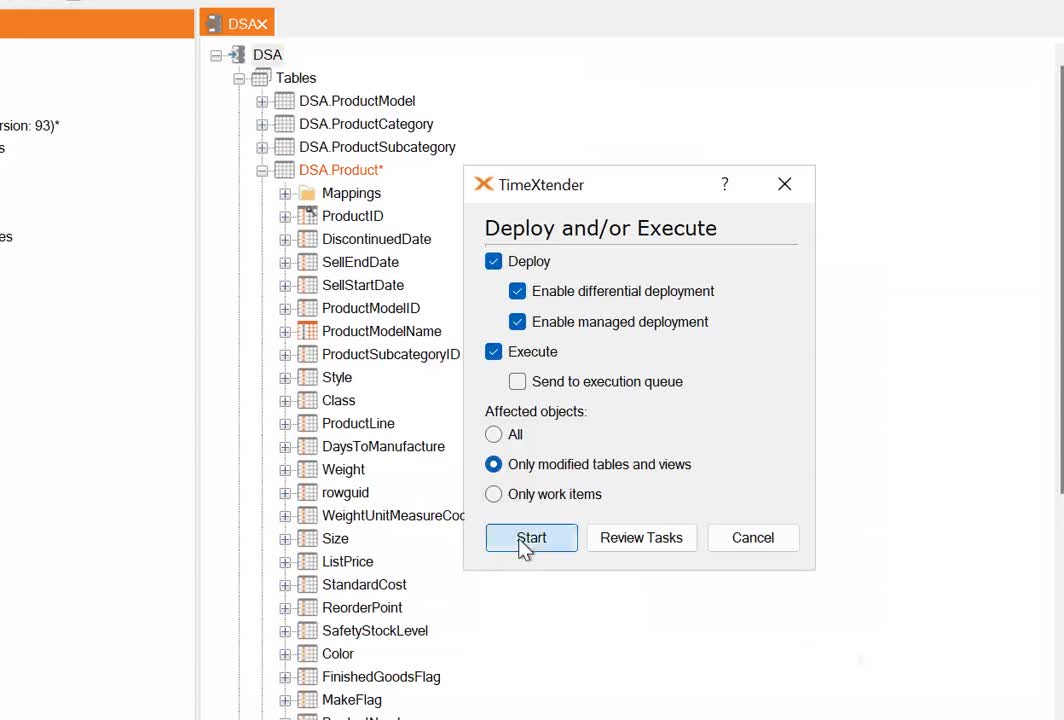
- In the DSA, right-click the
Producttable and choose Add Supernatural Key Field. - Type
Product_Keyin the Name box. - Click Add next to the Key store box.
- In the Name box, type
Product. - Optionally select a case-insensitive hashing algorithm, if the source database is also case-insensitive.
- Leave the remaining options at their default values and click OK.
- In the Business key selection list, click
ProductID, click Add, then OK. - Note the new field
Product_Keyand its data type. - Deploy and execute.
Track historical and current changes
The example below tracks Sales People data as it changes, and relates this historical data to Sales Order data.
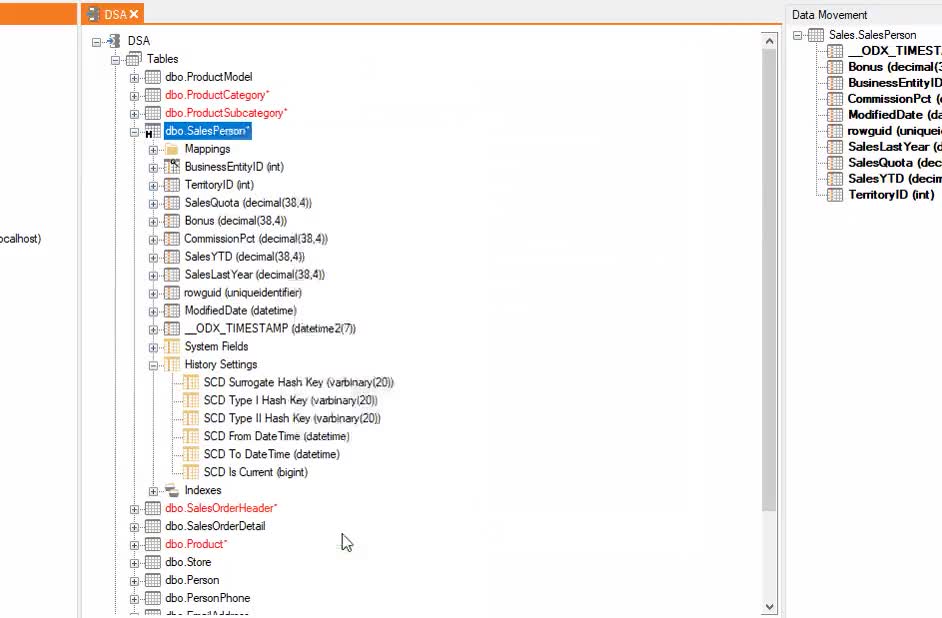
Enable Type II dimensions
- Open the Ingest table selector and search for the
Sales.SalesPersontable. - Drag and drop the table into the DSA. Enable history on the table with history settings —
natural key
BusinessEntityID, Type II fieldsBonusandCommisionPct. - Deploy and execute the table to enact the changes.
Related reference
- Customer dimension — the dimension this module adds history to.
- Product dimension — where
Product_Keyis used. - Table Transformations — other transformation options on the same tables.
Discussed in the community
Looking for related questions…
Didn't find your answer? Ask the community about this page — questions are answered by Timextender experts, partners and other users.